Showing posts with label clique kits shop. Show all posts
Thursday, March 2, 2023
Today's Stories layout | Clique Kits DT
Good morning everyone! I took a break for a bit and didnt make any blog posts, but I thought I would go ahead and start up agian. Why now? I have no idea, especilly since we have been having such bad weather and there is more to come tonight abd I am not looking foeward to it at all. But my scrapping makes me happy and helps keep me distracted from the weather a bit.
But I'm here today to share a layout I made with the Limited Edition Level Up kit. I really like this kit and I already have another layout to share, but that will come later. I like this kit so much becuase you can make complelty different looking layouts with the one kit.
This layout, I used mostley the papers in the kit from Asuko Studios.
I liked thecolors and I wanted to go outside the gamer papers. I started this layout with my picuter and then pulled on eofthe papers, the one that looks like it has sun rays on it. I cut it in half and adheared it to the top of my page. I wanted more to it though. I thought it looked to plain, so I pulled a few other papers and cut some strips form a few differnt papers.
I have this thing, I like to add some texture I guess you can say, really I like to distress the edges of my papers. So, of course I did that to this layout too.
I knew I wanted my photo of my son on the lower left side of my layout, becuase of the way he's looking in the picture. So I decided to start adding some papers behind the photo and pop them up on some adhesive foam. I placed that down and started pulling all kinds of embellishments out from the kit. But first I had to add my black splatters on my layout.
Once I took a little snack break while my splatters were drying, I decided it was time to go a head and start adding my embellishments. In the kit there is a pack of Pinkfresh studio cardstock stickers and puffy stickers and thats where my embellishments came from. I started tucking lables and little pennents and puffy stickers here and there along the strips of paper I had placed down. I popped a puffy sticker up at the top of my photo. Today's Stories, I placed that for my title.
I grabbed my type writer and tryped up my journaling, cut it into strips and added ti to my layout and called this one done.
I hope you liked this layout. Have you seen all the new goodies in the Cliqu kits shop?? I mean if you havent, you need to go check out the shop, so much goodness in there right now!
The kit I used for this layout is there, along with an add on to go with it.
Monday, December 5, 2022
Lovely Layout | Clique Kits DT
Good morning everyone, how was your weekend? Well it's been rainy here so, I got a little more time to scrapbook. I had a little that needed a little dental work, but we ended up having fun. I pulled my Limited Edition Heritage Poland & Ukraine Wonderful Wycinanki kit out and thought it would work great. I printed my photos, then decided to cut them out of the strip I started with and split them up a bit. I went through the kit and started pulling embellishment and of course some of the beautiful rub ons that came in the kit.
I knew I didn't want a bunch of paper on this layout. I decided that I wanted to play with some mixed media. I pulled some distressed oxides that I had gotten from the shop and started squishing them on a piece of plastic and adding it to my background. Once I had that done, I started to play with my pictures and where I wanted them. I decided the way I wanted to seperate them and then started to play with the things I had already pulled form the kit.
I started sliding pieces that I had pulled from the kit under my photos and then decided that I wanted more color. I really wanted to add a pop of that bright yellow in. So I grabbed a few pieces of paper and cut some strips and squares and started tucking them behind my photos. I added a few to the two pictures I decided to keep together and then decided to mat the other one as well. I just played with it as I went along making the layout.
Once I had the papers where I wanted, I played a little more with the things I had already pulled from the kit. I cut some of the rub-ons in half, I wanted to make them go a bit further. I added in more of the ephemera and the sticker I chose for my title. I just chose the one work, Lovely, because she was just a lovely little goof this day. It worked perfectly lol. She had no teeth problems at all, she was in for a cleaning, but had a really loose tooth and asked the dentist to pulled it so he did lol.
I wanted a little more in there so I ran some vellum through my sizzix, got some leafs cut out and added them. Added in my journaling about the day and called this layout good.
I hope you liked this layout and make sure to head over to the shop and check out all the beautiful kits that are there for the picking!
Tuesday, October 4, 2022
Sunshine Wanted Layout | Clique Kits
Good morning everyone!! I have a 12x12 layout to share using the Wildflower kit. One I love this kit! There are so many pretty papers and all the embellishments!! But for this layout I had to scrap a picture of one of my pups. It was a rainy day and he didn't want to go outside and he just moped around the house. He's so goofy.
He looks so mopey in this picture I kind of wanted to stick with more blues, but decided half way through that I wanted to add some of the yellow for some pops of color. This layout is really simple, but it was so fun to play with. I pulled a stamp, Flowers Always Add on, along with my watering can archival in and stamped on the upper part of my layout. Then I grabbed my Chartreuse stencil butter and watered it down and splattered it around on my layout, trying to keep it more towards the center of my layout so that it would show from behind where I was putting my layers.
I sat my background to the side to dry and started to play with the papers from the kits. I found a 3x4 pocket card that I decided to do my journaling on, so I knew that I wanted the first layer behind my photo to be larger but not to colorful. So I cut a large piece that fit both my picture and journaling card. I popped both of those up on foam adhesive and added them down. Made a mistake there. I hadn't added my stamping, but it worked out.
I pulled out a few of the other 3x4 cards and cut a label out of one to add in my layers, I didn't want to waist the rest of the card and thought the color of it worked great for adding to another layer, so I tucked it in at the top and off to the right side. It was all looking a little light at this point so I grabbed a large tag from the kit and cut it in half and added it to the right and left of my layers. I was liking the way it was looking so far but this was when I decided to add in some of those pops of yellow. I pulled a sheet of paper from the kit and fussy cut out a few strips of the scalloped strips and tucked them in at the bottom of my layers.
At this point I wanted to start adding more of my embellishments, so I dug in and pulled all sorts of pieces to tuck here and layer there. I found that yellow tab and added it onto my journaling card so that it would hide some of the writing that was on it that didn't really work for me, along with a piece if a tag from the kit as well to cover some more. At this point I added my journaling and then decided to pull a stamp from my stash and add a little rain cloud. I popped on my title and that was it for this layout.
I hope you enjoyed this layout!!
Tuesday, August 9, 2022
Fur Baby | Clique kits Design team
Good morning, everyone! Summer is still in full swing here and we are spending a lot of time outside. When the kids are busy playing sometimes, I like to sit back in my hammock and read. Well, the day I scrapbooked about one of my dogs decided to be my shadow. He wouldn't leave my side lol, so I had to snap some pictures and scrap them.
I love this collection by the way lol. The kit I chose to work with was the good Stuff sampler kit.The colors are so bright and fun, one of the reasons I picked it! I started off matting my photos into a photo strip and then running the dark blue paper with criss-crosses on it, through my sizzix. I loved all the non-perfect circles and the fact that I could use this color and not make it seem to dark. My pup was looking off to the right so I thought I would put my photo strip to the left of the layout and move on with my layout from there.
I went through the papers and pulled different ones I thought I might want to use and set those aside and pulled a few that I wanted to fussy cut a few things out of too. I pulled the rainbow striped paper out and decided to use it across the bottom of my layout, but I didn’t want that to be the only paper I used so I cut a strip of peachy pink paper too. I used a punch from my stash and ran it along one edge of that and slid it under the striped paper.
I went through and started pulling ephemera out and playing with where I wanted it on my layout, along with a few of the items I had fussy cut out earlier. I had thought I was going to use just the 3 labels I had cut out for my journaling and realized I had more I wanted to document, so I decided to make the patterned papers I added to my layout a pocket. This way I could hid a little more journaling n my layout and not make it overwhelming.
When I was done sticking all my stickers and labels and stuff down, I thought there was too much white space at the top. I saw that cute sun in the ephemera pack and thought it would work great on the top of my layout, so I cut out a few clouds by hand and laid them on my layout but thought I would take it a step further and run it through my sewing machine too. Lol. That finished this layout off.
Monday, July 11, 2022
Nope Not Today Layout | Clique Kits DT
Good morning everyone! I hope your weekend was good! Well today I wanted to share a new layout with you using the Sampler kit, The Good Stuff. Its chock full of beautiful Simple Stories products and I love it!!
This kit has so many cut a parts, if that's the way you want to go, if not then there is the full patterned papers on the other side. So Many options!
I use to only scrap the good, happy things, but I thought that's not real life. There are bad or sad things that happen too. Well, a few weeks ago we were out playing and my daughter wiped out on her scooter. She handled it so well though. She sat down and cleaned it up, rested for a few minutes and was back at it. I was proud of her. And I guess this wasn't only sad or anything, like I said she handled it well.
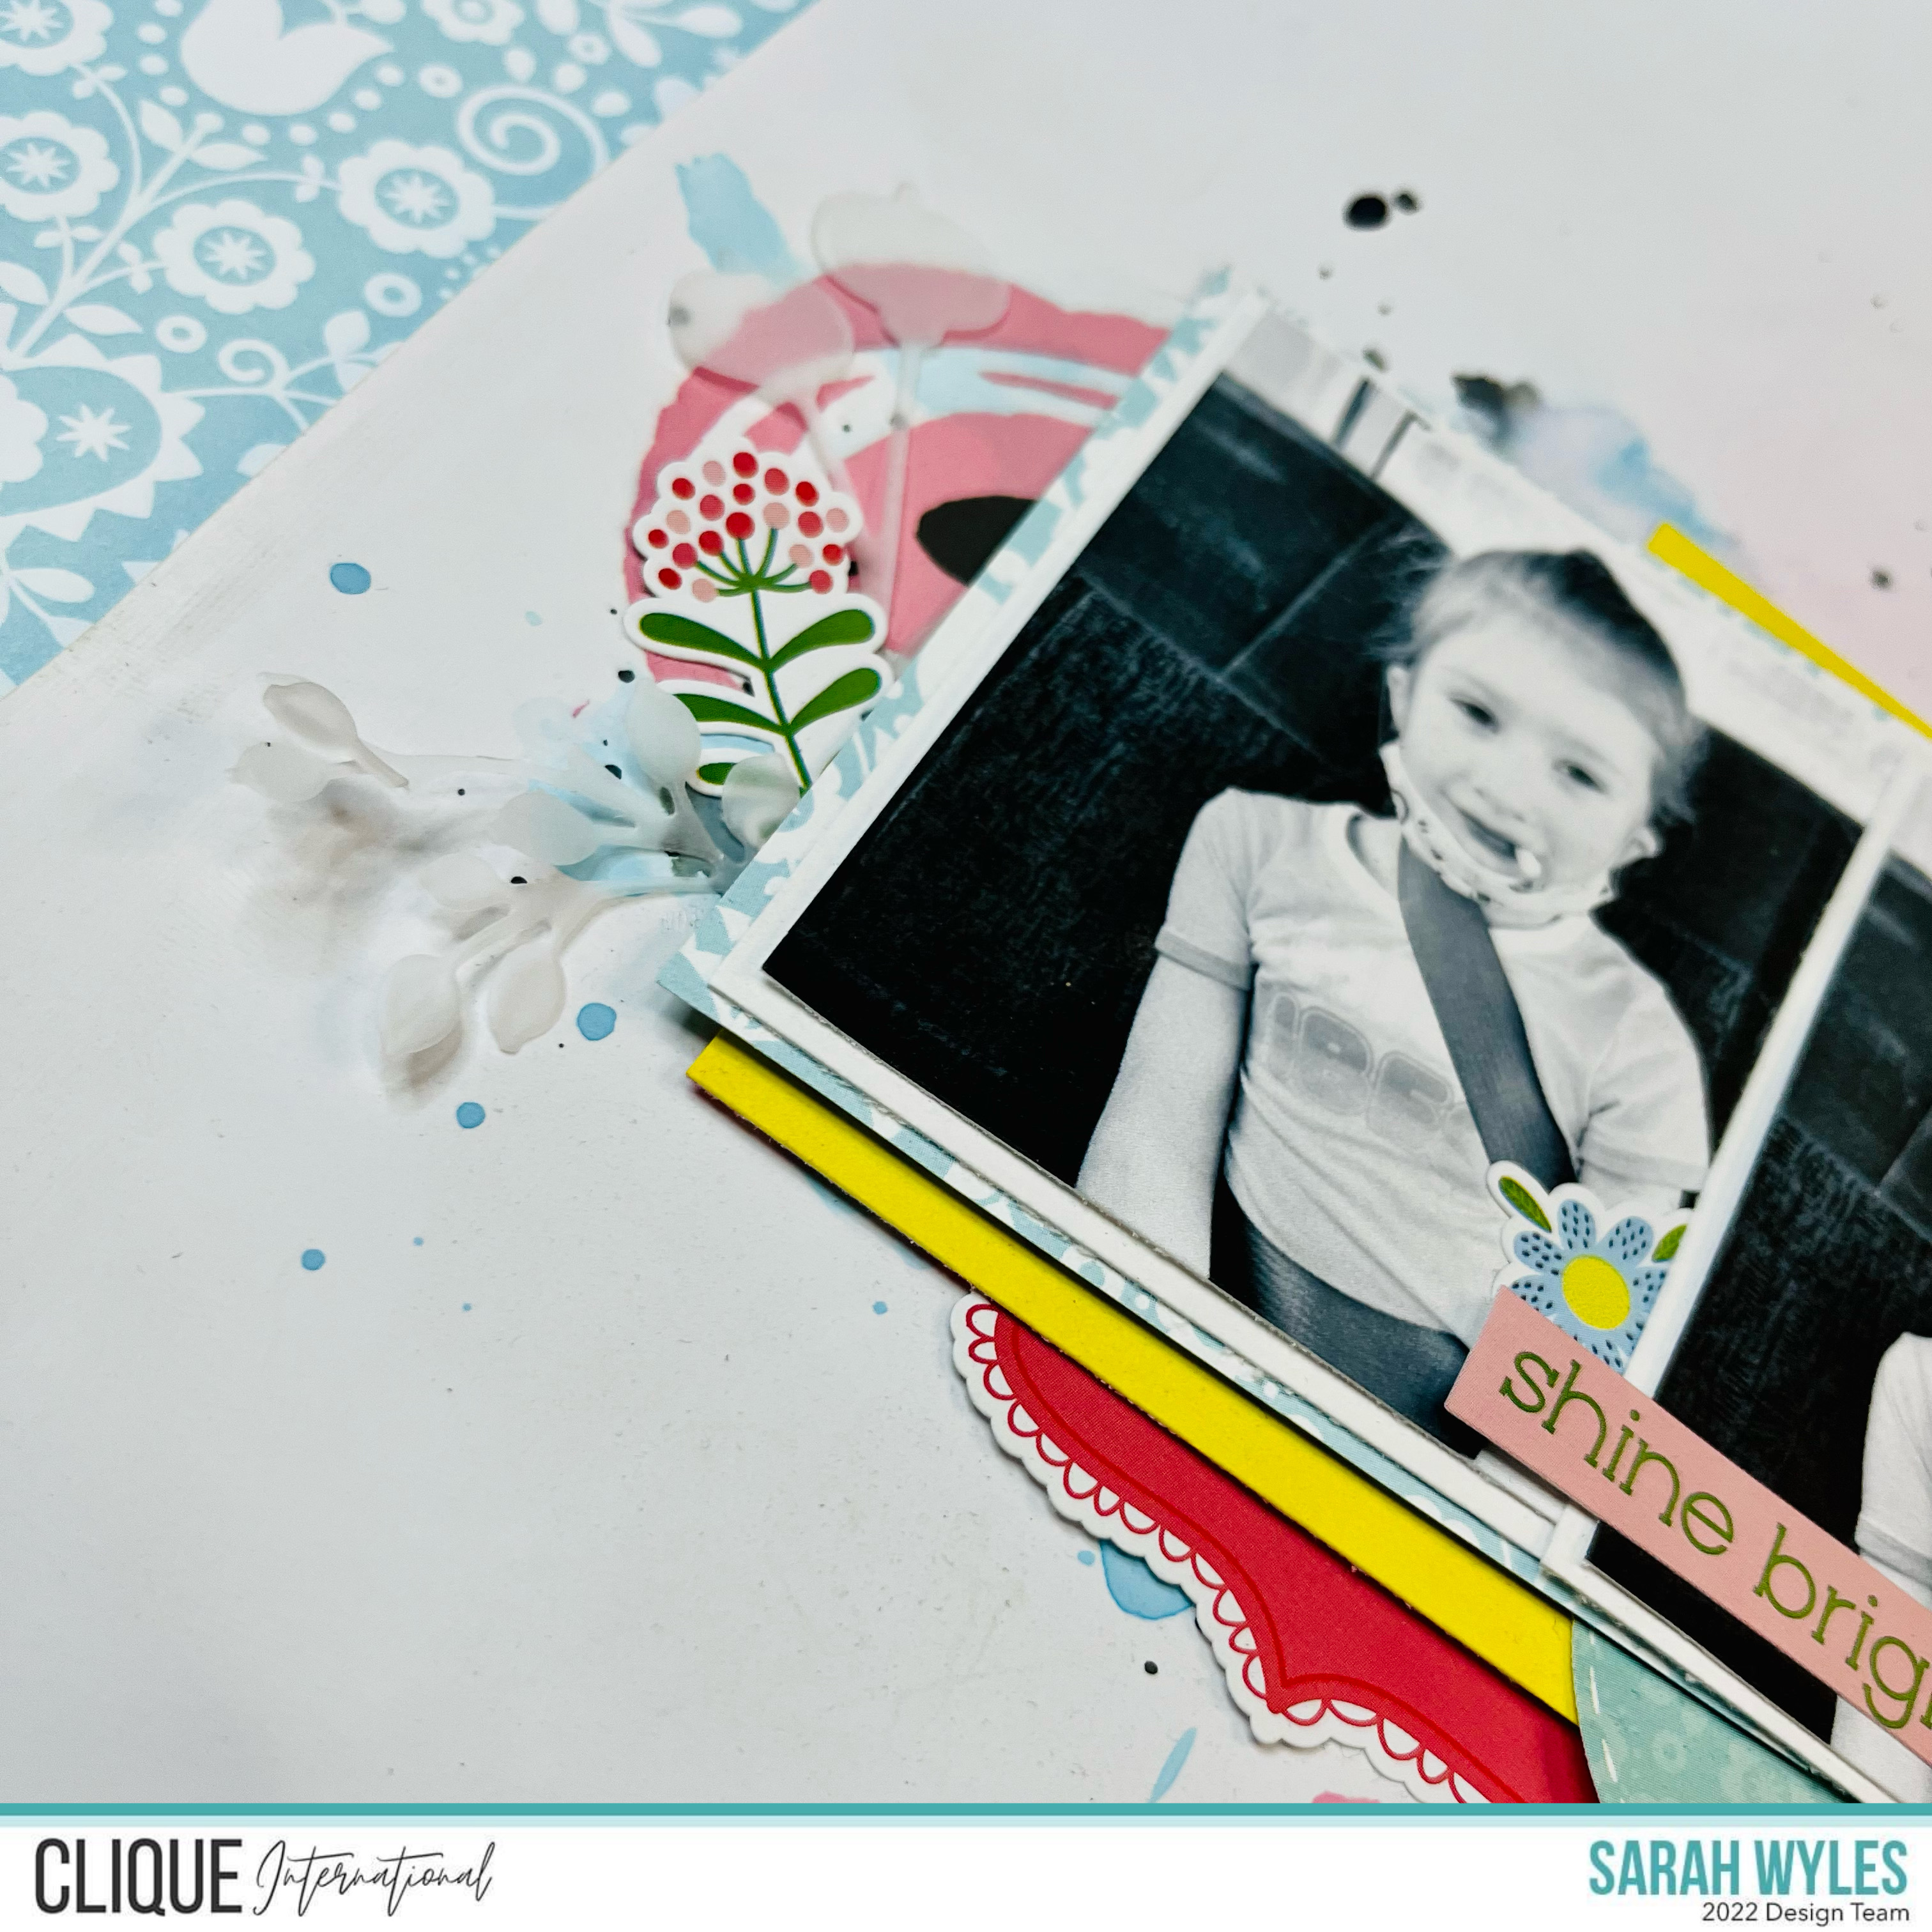
Well to the layout lol, I pulled out The Good Stuff kit and started pulling papers that I thought I might want to use, so all of them! lol But I went through and pulled ones that I thought went well with what I was scrapbooking and telling the story about. First I saw the one that said Nope. And the fact that it had room for journaling, it was perfect! I liked the floral one too, but wanted something else added to it. So, I grabbed those and a few others, but decided when I laid them out that I only really wanted the two cards and to back my my photos with white cardstock.
I had set them up in a grid or square on my layout and decided it was just too much white. There needed to be some more color behind everything. So back to my papers and I found the adorable paper with peaches on it. I decided to use it, other than it was cute, she was a peach about the whole deal, she handled it so well, so I thought it was fitting lol. Plus really it's cute! I added the peach paper to the background and ran it through my sewing machine, this way it was in place and I was really starting lol. I laid my pictures and cards back and thought it needed something more, so I grabbed a scrap piece of the dotted paper and added it too and ran it through my sewing machine.
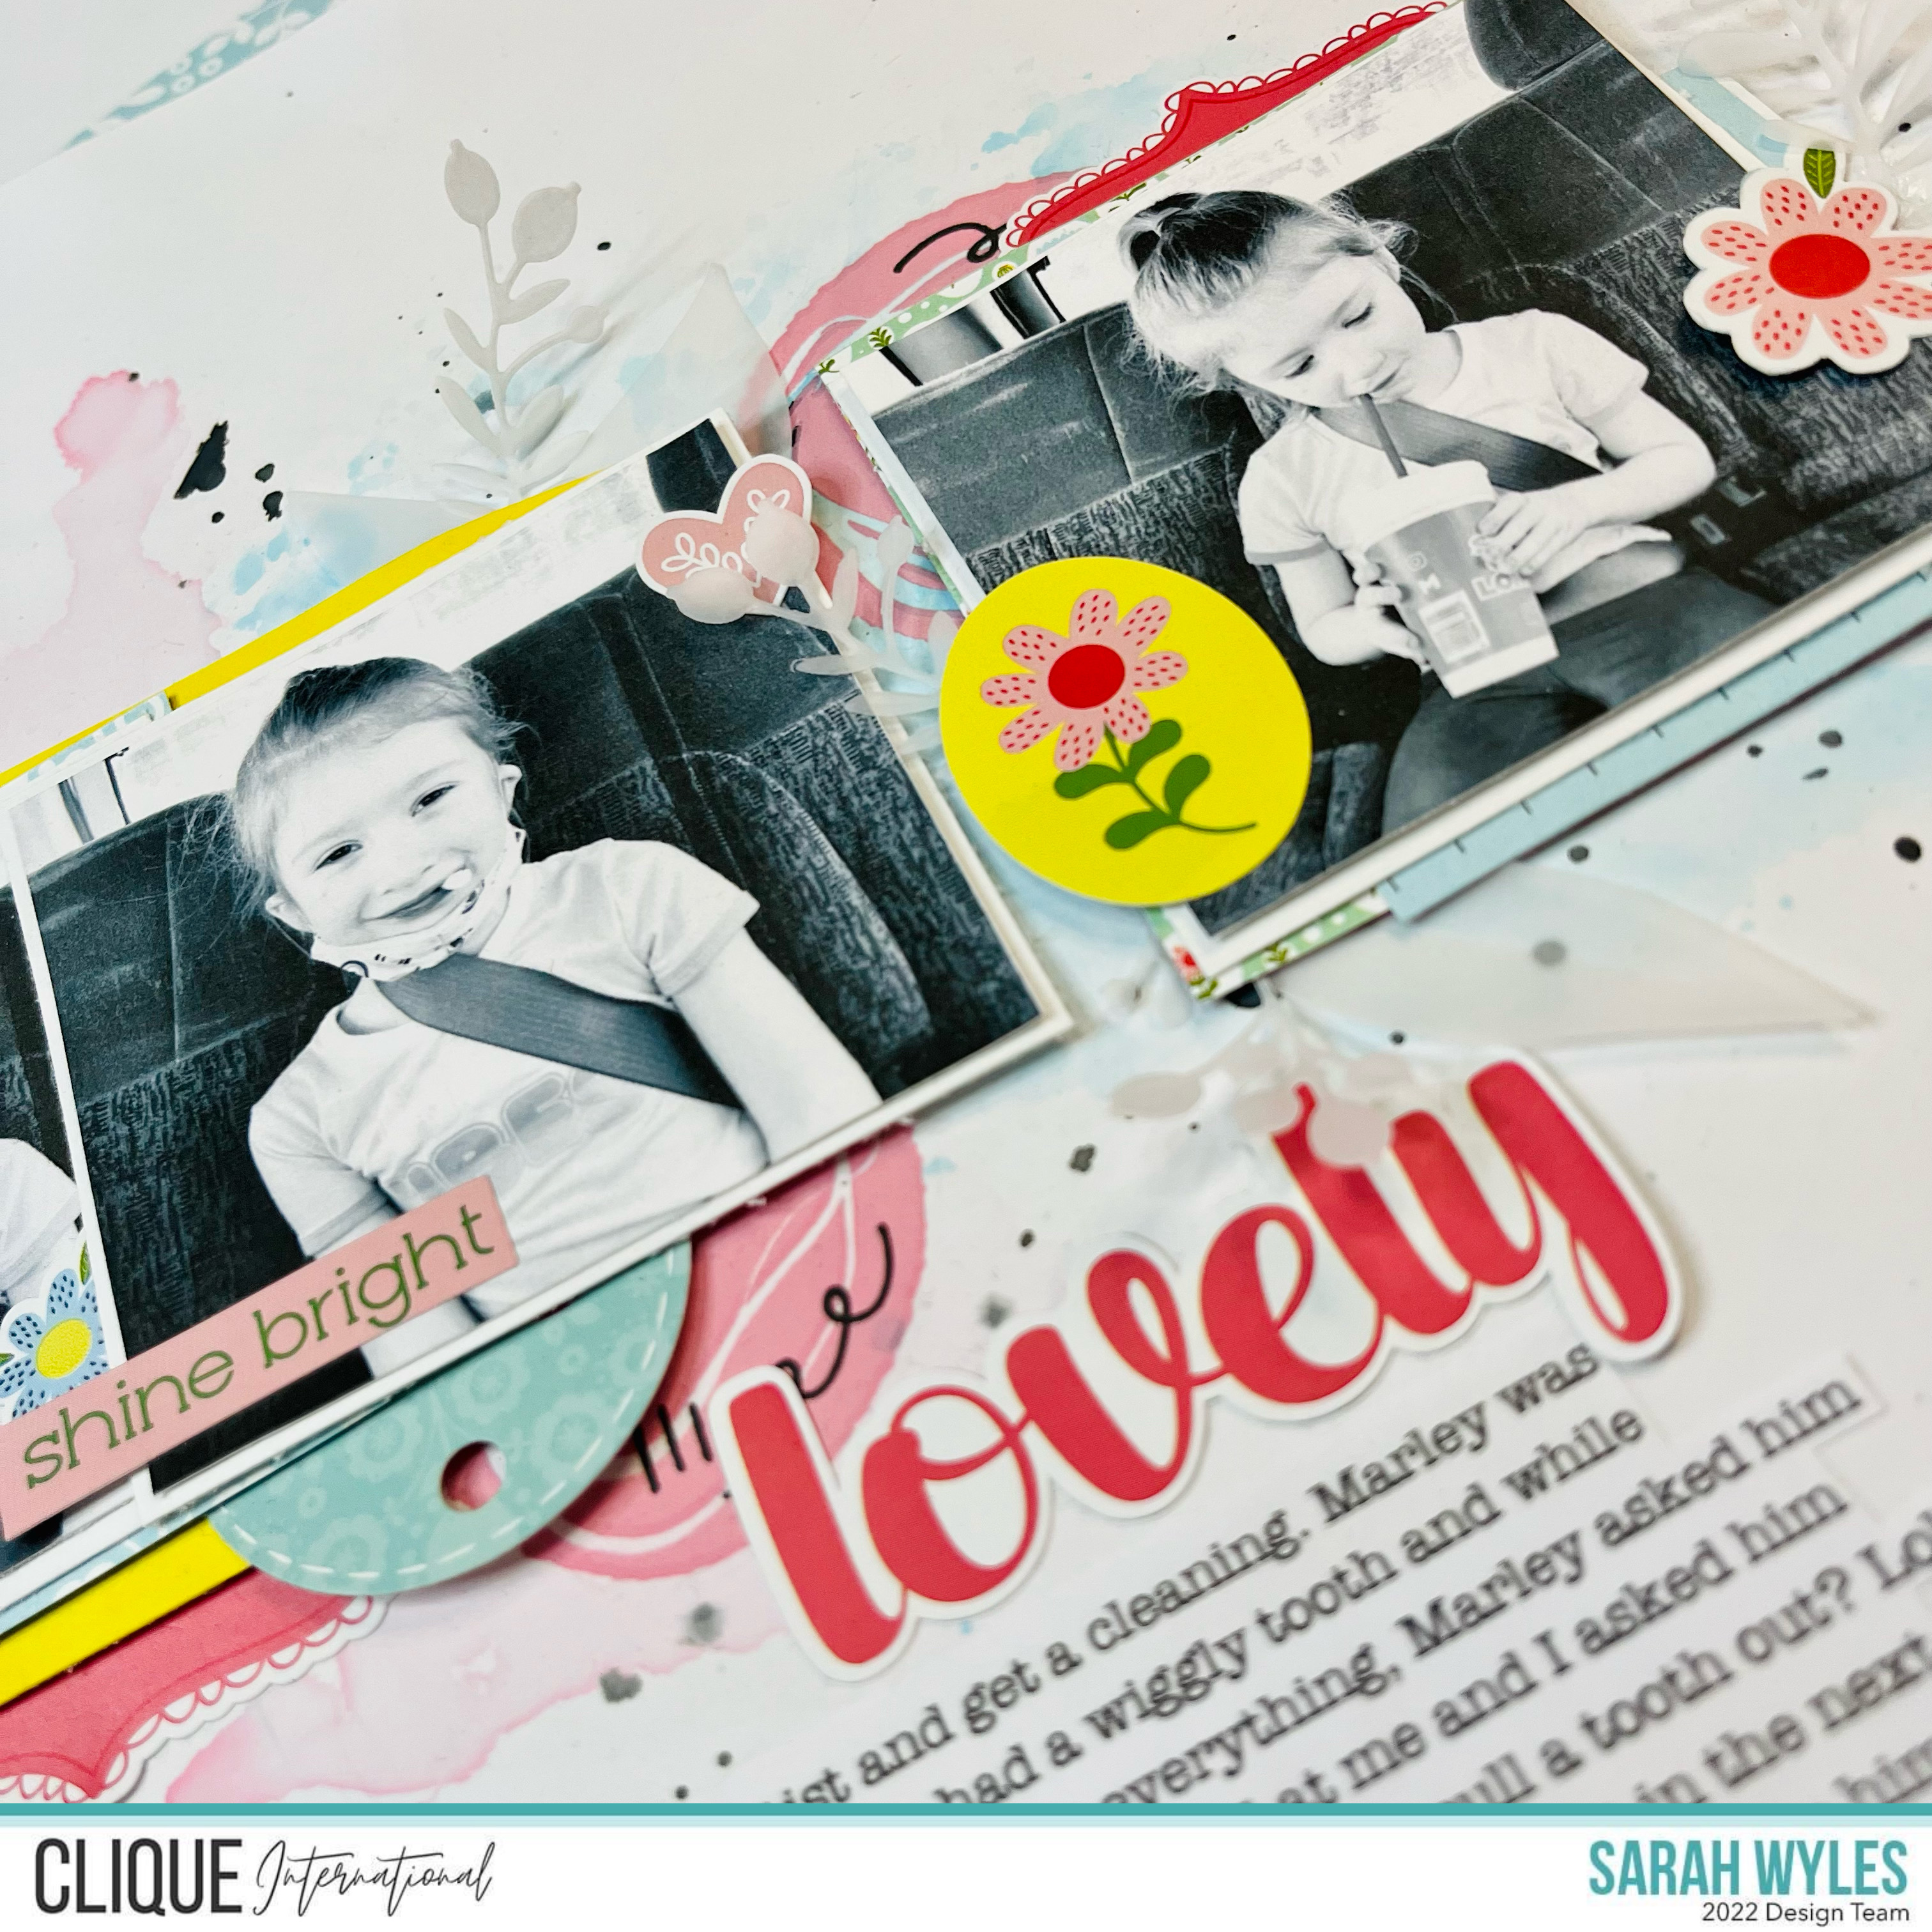
After I had my jumping off point on my page, I started to stick down my cards and photos. I took another scrap and added it behind the bottom left cut a part and then started sewing again. I like the look of the stitching. I had already ran my journaling card through my printer, so that was done and able to be sewn on. But I made sure to leave a little space at the top of my journaling card to be able to slide a tag in and add a little more info for her, when she gets older. A little note from momma ay know lol
At this point I needed to pull some ephemera and add little bits here and there to finish off my layout. I pulled out my ephemera and of course had to add some flowers, but I love that there was a little banner that said nope not today to add to my bottom left card. I also cut out a label from one of the cut a parts and added it then added some more stitching. I added a little circle with a heart on it and a sticker to the picture of her little knee. I pulled out the enamel dots and added them here and there and my layout was done.
I hope you enjoyed this layout and make sure to head to the shop and check out all the new goodies in there!
Thursday, June 23, 2022
What if I fall... | Clique kits DT
Hey everyone!! Ok, so this year has been about trying new things for me. And I'm still doing that and really liking it. I started my year choosing the word Freedom. Its freedom to create, play and try new things. So this week I tried something I got from clique kits and had never used before, the add-on kit - Pleiades. Its Lindy's magicals and they are amazing!! I had never tried them before, but I am happy that I did now and I can see myself playing with them quite a bit in the future. I also used the Sampler kit - Butterfly Whispers.
There is so much to this kit in the first place, but the fact that it's all so stinking cute!!
I opened up my mixed media journal, or at least what I'm usings as on lol. I added a layer of clear gesso. Once that was dry I pulled out the Magical powders and started to sprinkle them on the right page here and there. When I started this, I thought I was only going to do one page, but that's not how it turned out. I just had to much fun. Once I had the powder sprinkled around, I started to spritz it with my water and the colors came to life!
I used Galactic Teal first, thinking I wanted the page closest to the middle to be dark, but then I started to sprinkle the Martian Magenta around and it was sooooo pretty. I started to sprinkle it on the other page too to see what I could do with it. I like the variations in color across the pages. I played and tilted the book to see it run.
I decided to let that dry a little while I played with fuddy cutting out a few things and going through the embellishment packs that came with the kit. So many things to chose from. But the piece that said what if I fall? What if I fly? really stood out to me in the moment, so I grabbed it and pulled the other things that felt right to me.
After I picked those things I decided that I wanted to add some yellow, because come on, that UFO Yellow in the Lindy's magicals was too good not to be used. I mixed it with a few different mediums so that I could get some opacity to it. I wanted it to sit on top of the other colors. End the end I went with clear gesso and a little bit of white paint and it worked for what I wanted. I grabbed my pallet knife, picked some of the color up with it and scrapped it across my pages in a few places.
Once I let that start to dry I started to add the What if piece where I wanted it and then moved on to the little cuties, butterflies and that bear!! I printed off a few words from my printer to go in fandom spots on my spread. I cut them out and doodled black lines around them. Once I had all those down I decided to pull out some of my paint pens.
I used a few sizes of white paint pens and my gold one too. I kinda went a little crazy with it. lol. I copied some of the shapes from papers in the kit and then added some little dots in clusters and some small line strokes. I chose to outline some of the shapes too.
I actually had so much fun with this. It's a first time thing, but I didn't feel any stress when I was playing with this and it ended up double the size I started out thinking I was going to do lol.
I hope you enjoyed this and it would be great to see what yall are doing with your kits too! Make sure to tag us on Instagram!
Tuesday, June 7, 2022
Hello everyone!! Sarah here, sharing another new layout using the Happy Hearts, sampler kit. I love this kit lol. I think I have probably said that a few times since I got it!
I have been playing with different page sizes so far this year and this one is and 8.5x11 and it seemed to work out just right.
I started with a white background, I already had my photos in a little photo strip. I knew I wanted my photo strip towards the middle of my layout, so I went through my papers and pulled a few that I thought I wanted to play with. Once I did that I figured this would be a perfect layout for a to-go coffee cup. So I set out making that lol. Any way I can incorporate a coffee, I will lol.
I figured out how I was going to place the to-go cup with my photos. Knowing this, allowed me to know how much paper I could use adding my layers. I added two layers behind my photo and stuck my photo cluster and coffee down, typed up my journaling and added that below my photos. At this point all the things that I needed on my layout were there, so it was time to embellish and add some more pretty papers.
since it was time to play with more fun papers and stuff, I grabbed some of the papers I had pulled previously and cut some strips and added them to the top and bottom, then I decided since my layout was a bit heavy on the left side because of the to-go cup, I should add a little something more to the right. I cut a triangle out of the pretty floral paper and added it to the bottom right and then went to pulling a few florals to add.
I tucked a few little pieces of florals to the top and down at the bottom, tucked under my little triangle and called this layout done.
I hope you liked this layout, I love it and can't wait to play with this kit more!
Make sure to head over to the shop and check out all the new kits and pretty things!
Monday, May 23, 2022
Wonderful Layout | Clique kits DT
Good morning everyone!! How was your weekend? We had plans this weekend and that didn't happen because it rained and stormed, so we just changed out plans to some indo stuff and still had fun!
But this morning I wanted to share a new layout with you that I made using the Sampler kit, Happy Hearts. I love this kit. I have played with it a few time and will keep playing with it till its gone! lol I mean come on, there are pretty papers, puffy stickers and pretty ephemera!
I ran my cardstock through my silhouette, I liked this big pretty ampersand and thought hey with the pictures I'm scrapping that it would work. lol. I backed the leafs in my cut file with some light green paper and then covered the rest with a light pink. I knew i wanted this to be a little more subtle, but still look good. I already had pulled a bunch of ephemera and fussy cut out some flowers to embellish with, so I already had a color idea.
Once I had the cutfile taken care of, I went to backing my photos. I added a white border and then color behind each of them do that they would pop. I played with where I wanted them on my layout, until I was finally ok with where they were sitting and adhered them down.
So at this point with all the pictures adhered down, I could start playing with my title and embellishments. I had pulled everything that went along with reading out of the ephemera and put it to the side when I started this layout, so it was all just sitting there in a cute little bowl for me. I pulled out the fussy cut flowers and tucked them under the edge of some of the pictures and then started adding the pretty books from the ephemera pack
I added some of the fussy cut flowers to the top right, along with that cute little puffy sticker that said happy little moments, because for me it is lol, I love to read. I had pulled the word wonderful out from the ephemera pack and popped that up for my title. I printed out my journaling about my books and added that to my layout and I called this one done.
I hope you enjoyed this layout, this kit is still available in the shop, along with so many other pretty things! Head over and check it out!
Thursday, April 21, 2022
oofy Love | Clique Kits Design Team
Good morning everyone!! How have you been doing? I was sick for a bit, but am feeling so much better now! Finally good enough to do a little scrapping! Clique kits has a bunch of new kits in the shop and I was so excited to play with the new Happy hearts kit! PinkFresh studio always has a ton of amazing stuff in their collections!
Ok so I'm not going to lie. I have used kits or collections in the past that had some of these really cute embroidery hoops and I had a hard time using them, so I thought what better way to start off using this kit, then to use them first?
Well I had a fun goofy picture of my daughter and her fruit kabob and thought this would work,lol. I pulled the wood accents pack from the kit and chose 5 of them to use. I dipped into the ephemera pack and grabber a few of the paper embroidery hoops from there too.
I started with a piece of white cardstock, grabbed some stamps from the stash and a few distressed oxides ( you can find them in the shop too), and stamped some little splatters here and there. I knew I wanted my photo to go in the center of the page and the circles to go on either side to I started to pick where I wanted the circles to go and in what order.
I knew I didn't want both pieces with writing in them to go next to each other and I also knew that I had the one blue and one purple piece and I wanted them on opposite sides too.
I placed all the circles down, decided to grab a few flowers and tuck them in behind some of the embroidery hoops just to add a little more. Then I decided instead of leaving my photo with nothing but a white mat, that I would add a few layers behind it and pop it up on 3d foam.
I chose one of the words from the title ephemera, Love, and pulled the beautiful gold alphabet and added goofy to the tops of my photo. To finish off the layout, I decided to grab a couple of the cute butterflies from the ephemera pack and add those going away from the photo at the top. And that finished my layout!
I hope you liked my layout and make sure you head over to the shop and check out all the pretty things there!
Tuesday, April 5, 2022
Happy Memories | Clique Kits design team
Good morning everyone!! How is your day going? It looks like rain today, so I'm hoping for some scrappy time! But right now I thought I would share with you another layout that I made with the Best day kit from the Clique kits shop. It's still available too!! So make sure to go check it out!
I have made so many layouts and projects with this kit, its amazing and I love it! I al trying to use up every last bit of it. And this layout came together so easily.
I had a goofy pic of my son at the store with the peep he picked out and wanted, so I decided, even though my picture is in black and white, I knew that the peep was yellow. So, I decided to grab some of the yellow paper and ephemera pieces from the kit and use those, along with some pretty blues, oranges and greens.
I added a small strip of grey down the right side of the layout, followed by a strip of the yellow plaid. This way I had a place where my photo would sit and I could build from.
Once I had done that, I knew I wanted a place to add some journaling about the shopping trip and the peep he found and brought home, but with this being and 8.5x11, I didn't want to take up too much room with my journaling and make it feel crowded, so I grabbed one of the pockets from the kit and a few of the tags that fix easily in it and added them as a layer behind my photo. That itself ended up adding some dimension lol.
After my journaling was done, I started to play with the ephemera pieces that I had pulled. Tucking bits and pieces here and there. I wanted to use that happy memories tag as my title, just for the fact that this was a happy memory and the tag was cute!
I tucked in some other tags, floral pieces, word sticker and that cute chipboard BFF piece and moved on. I felt there was too much white space. I pulled some of the pieces of ephemera I had left, from what I had pulled earlier and started making little clusters out of them till I was happy with the way they looked.
I added one to the top, with a sticker that said Photo op and a chipboard circle and then another to the bottom with little bits and pieces that were left over and cut off from pieces I had already used on the page. Yeah I like to try and use it all!! lol I decided to use some of my distressed oxide, mix two colors, pumice stone and black soot, and added some platters and that was it for this layout.
I hope you liked this layout and make sure you head over to the shop and see all the beautiful kits there are!!
Subscribe to:
Posts (Atom)