Showing posts with label Stamps. Show all posts
Showing posts with label Stamps. Show all posts
Monday, October 16, 2023
This is my Summer layout | DLS Design DT
Hey everyone! How are you doing this morning? It's actually getting cool here but I'm going to keep doing summer layouts! lol Do you scrap seasonally? Only summer in summer and winter in winter?
Well I wanted to share a layout I made for DLS design, I have a process video for it as well and will add that link towards the bottom.
I pulled out some of the stencils, sime of my distress oxides from my stash and went to town on the background. It still suprises me from time to time that it really doesn't take to much time to play with a little mixed media. I added a little water to the edges so that they wouldnt be clena and perfect, well i guess you'll see that in the video lol
But I had fun playing with the stamps ontop of the stencilling, and moved on to cutting and layering papers. Ok I'll stop talking now and you can just watch the video lol. Hope you enjoy!
Thursday, April 27, 2023
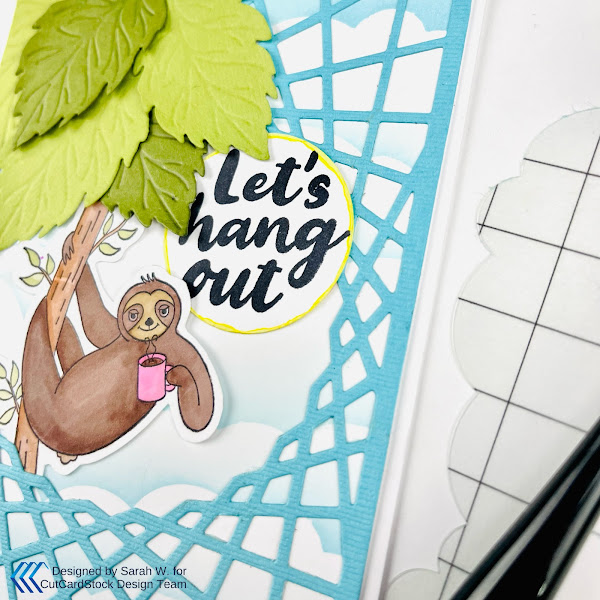
Let's hang out Sloth card | CutCardstock DT
Hello everyone!! How are you doing today?? Well I wanted to share a new card that I made, with a sloth! I love sloths!! lol I have to admit, I love playing with cards with the cardstock from the shop. I have been playing with everything I can think of on this cardstock. But with this card, I used the white Cougar Smooth Cardstock, I used watercolors on it for my sloth, along with distressed oxides on the background for clouds.
Once I had finished painting my sloth, I realized that the branch wasn't long enough. I knew I wanted to add a top to it so I grabbed two greens, Jelly Bean Green and Galax, and cut out some leaves. I added them to the top so it looked a little more like a tree.
After I had that done, I decided that I wanted to add some more blue too. I riffled through my dies in my stash and found one I decided I wanted to use, pulled Surf and ran it through my sizzix. I trimmed the end of the limb from the sloth branch. I tucked it behind the blue die cut and then added the leaves to the top.
I popped a circle out of the cardstock and stamped Let's hang out on it. I used my squeezed lemonade distressed oxide around the edges and popped that on to finish off my card.
Saturday, June 1, 2019
Paper Sweeties Plan your LIfe series
Good morning everyone!!
I'm here this morning to share with you my monthly planner spread using great products from Paper Sweeties
I pulled out the Basket add on: Thinking of you stamp set and stamped a few flowers, I had found some of my gel pens and decided that I wanted to color my flowers in that way this month. Then I grabbed the sign from the same collection, stamped and die cut one of those out. I pulled out the Handmade for you stamp set and stamped Crafty goodness on the sign and added it in where I knew I would be having some fun craftyness in the month.
I added my flowers in here and there along with some washi from my stash to add a little more color. Decided I wasn't happy with just that, so I looked back in my die and stamps sets and remembered the banner from the Truck add on: Life is an adventure set and the Sweet cuts: Life is an adventure set and cut me out quit a few banners and added those in as well.
That finished off my monthly spread. I will be adding more on my daily pages and share them along the way on instagram,
Make sure to go check what the rest of the design team has created and make sure to come back and see the new releases for this month, ganna tease, but oh man are they adorable!! You wont wanna miss it!!
Thursday, May 16, 2019
Paper Sweeties May release rewind
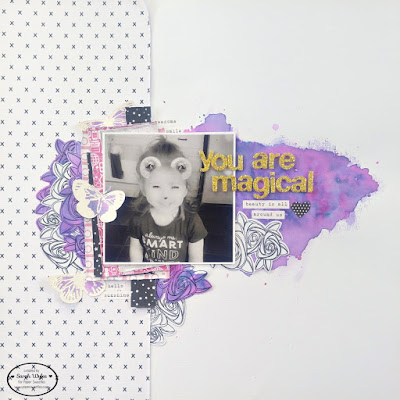
Today is the 3rd day of the new release at Paper Ssweeties and the last one till next months release, So I thought I would pop on and share another layout I made using some of beautiful new stamps and cute cuts.
When I started this layout I knew what picture I was going to use, so I grabbed some Jane Davenport mermaid markers and started to mix and play with colors until I got the purple that I wanted and added splatters of pink in with it as well.
I made sure to do the mixing and playing with the colors on a few different pieces of paper so that I could use some of it for stamping on and cutting out. After I got the background the purple I wanted I started adding layers behind my photo. I knew there wasn't a lot of pink in the colors on the background so I added more pinks behind the photo.
I stamped with the Thinking of you stamps, I used those beautiful flowers. I stamped them on white cardstock and on some of the paper I played with the mixed media on, then used the Sweet cuts and cut them out and layered them in with the papers behind the photo.
I loved the way the flowers looked, you can do so much with them, they are amazing for layering and stand alone. I hope you head over to the shop and check out the new,(and old) selections of stamps and sweet cuts!! And make sure to check out the rest of the design team too!!
Wednesday, May 15, 2019
Paper Sweeties May 2019 New Release
Good morning everyone!!
It is beautiful today and these Life is an adventure stamps and dies were just what I needed to work with!!
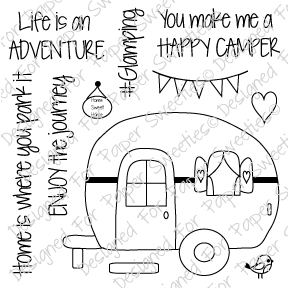
I had some pictures from us going camping and oh man these little campers just needed to be on the layout!! I used them in my planner this month too, but I paper pieced them that time and I wanted to play with them with my water colors this time. So many ways you can play with these!
I waited till the water color was almost dry and ran a dry brush across it to make it have some texture and to me it made the camper look a little dirty lol and thats what I was going to. I loved the fact that I was able to tuck it behind the little hill, enjoying my fringe scissors right now too.
On this stamp set there are some really cute little sayings and I used a few. The life is an adventure worked perfect on my tab and you make me a happy camper was fun to add in down by the little camper. I really wanted to use the #Glamping one, but with my kiddos we definitely weren't glamping lol
I added another camper in, I cut do many out and painted them I could have probably could have filled a whole page with them, lol they are just to fun to play with!
I hope you enjoyed this layout and make sure to check out the rest of the design teams creations too and head over and check out the shop and blog!
Subscribe to:
Posts (Atom)


