Showing posts with label Bella Blvd. Show all posts

Tuesday, November 14, 2023

Hedgehog Slimline cards | CutCardstock DT

Hey everyone! I hope your week has started off pretty good! Well today I wanted to share these two cute little fall cards with Hedgehogs on them! I think they are just too cute!
I created the base of my cards out of Cougar White Smooth CardStock, like normal. I also did all of my stamping on the same cardsrtock. This is my normal, I like the way the paper takes the different inks. Not just stamping but distressed oxide too, as you can see I made a background piece with distress oxide and a cloud stencil.
I colored all of my little hedgehogs,(these are My Favorite Things, Happy Hedgehogs), with my alcohol markers and a little white gel pen. I ran some patterned paper through my sizzix and created the scalloped edge and then ran Gingersnap cardstock through my sizzix as well with the dies to cut out the holes. I had to have somewhere for the cute little hedgehogs to go!
Once I had places all the hedgehogs, their logs, mushrooms and othere little things down I added some 3D foam to the back of the solid cardsotck and stuck it down. On the green casrds I had chosen to use Gumdrop Green, I pulled out a few distress oxides from my stash and inked around the edges and stamped my sentiments and call these cards done! I hope you enjoyed these cards and I hope you come back to see what else everyone comes up with!

Monday, June 20, 2022

Cute Girl Obsessed | Guest designer for Shimelle

Hey everyone! I was so excited to be asked to be a part of this! And then I kind of freaked out cause I didn't know what I was going to do. Just being honest,lol. But a few days later I walked in to see my daughter playing on her floor with her ponies, dinos and cute little dino blanket on her head and snapped a few pics and thought this was perfect!
I scrapbook a lot of pictures and they always mean something to me, even if it doesn't look like it to others. But this, this was a shot of my little girl, being completely herself and loving every minute of it. I want to make sure to collect all of these moments because she's growing up and doing it fast and I don't want to forget any of it. Ok, ok now to putting my layout together.... I decided in the beginning how I wanted to have my photos clustered together, so I added some adhesive and stuck them together and figured I would figure out the rest as I went. I knew she was looking to the left in all three of them so I knew I wanted my pictures to be on the right side of the layout, then came the little bit of mixed media on the background. I pulled two of my Fun stampers' journey liquid color and splattered them around, hit it with my heat gun, cause I'm impatient and kept moving.
I pulled out my little bin where I keep all my scraps and particley used 6x6 paper pads and started pulling the colors I had decided to use. I have a love for the colors teal,pink and yellow. I also threw in some black and white paper and small touches of gold. These are colors I love together but are also some of my daughters favorites lol, so it works out great for me.
I started pulling papers and tucking them behind my pictures, not even caring that they were from different collections or manufacturers, they looked good together and that's all that mattered to me. I love scrapping this way, it makes it easy for me. Once I had all the layers right where I wanted them, all stuck together, I added some foam adhesive to the back leaving a space to the upper left where I had decided to place a tag that slid down behind the pictures, a little note for my little miss when she gets older. I am not huge on journaling where it can be seen, I usually do it with a hidden journal spot or on the back of the layout, but I wanted to leave a little note for my daughter, something hidden for her, that let her know exactly how this moment made me feel and how I loved it.
After that, I pulled out my bin that holds a bunch of random ephemera pieces and chipboard pieces, pulled things in my color set and started tucking them here and there till I was happy. This always takes longer than I think it probably should, but I move things around sooooo much lol. I thought I was done at this point, I liked my layout and thought my daughter was front and center and pulled the focus, but I felt like my page was a but one sided, so I decided to grab some of my scrap paper stripsand add them to the far left edge and a few little strips at the bottom. I went back and grabbed some of my Bella Blvd puffy stickers and My Mind's eye enamel dots, tucked them here and there and I was finally happy with my layout and called it done.

Friday, August 28, 2020

So crazy awesome layout

Good morning everyone!! Yesterday was a major rainy day. Ya know, just a little flooding. lol Its still raining today, but power is back on and school is in session for the littles. So hopefully that means a little more scrapping time, we will see.


I had fun with this layout though. I really didn't use a lot on it. And I actually used a colored background. I so rarely do that lol. I honestly wasn't planning on using white acrylic paint to start out with on this layout, but after pulling all my scraps from the Addison collection, using my die cutting machine to cut all these circles, there was a lot of color and it just looked like it needed a little something else on the background.


I laid everything out and I was just having an issues with nothing but blue in the background. So I pulled out some white acrylic and started dry brushing it across the center of the background, from the top to the bottom. I like that effect that dry brushing had on the background. It didn't cover it all, but left it a little wore looking. 


I didnt let the paint dry all the way, a bit impatient lol. So I started laying things back where I had them before, popping some of the circles up with foam adhesive to add a little dimension. I started stuffing some of the cute feather ephemera here and there.


I love the little messy look of the thread that Missy does, so I thought it would be a nice touch, adding a little more texture to the page. I also added in some black splatters. I thought I was don't at this point, but it was missing something. I just wasn't happy with it. So I grabbed some of the paper strips I had left over and started layering them on the left of the layout, tucked a circle or two, added some thread and a few tabs and that finished it for me.

I know I'm not amazing at walking through my process here lol, I feel repetitive a lot of the time, but I guess thats just me lol

I hope you liked this layout, you can check it out over on my facebook page
https://www.facebook.com/scrappinmylittleroyals 
this page is just scrappy related things and Id love to see y'all over there and hopefully Ill get some process videos up soon on my youtube channel!


Monday, August 17, 2020

Scrappy layout and rambling


     Hey everyone! It's been a while, hu? 

    Life has been crazy for a while now, but for the most part, a good kind of crazy. With quarantine and all, I've had a lot more time at home but not a lot more time lol. We've been working on the house. Since all the stuff was already just sitting there in the garage, so making headway there. The kids are going a little stir crazy, but we've been finding things to do, so thats a plus. I'm betting everyone is having some issues keeping kids entertained lol. I have got my littles and not so littles no, (my oldest is taller than me!!), into doing more crafts. My youngest recently turned 4 and she got a really cute journal and some great gel pens, along with a bunch of other stuff, and she was so excited about her pens and journal. She looked at me and told me that now she could do like me. She went to drawing and writing about her birthday. I thought that was awesome. The girls with scrap with me more than the boys, but they get into painting. Canvases, walls, hydro dipping shoes and other things. It's definitely interesting lol. On another note...

    Right around the corner school will be starting again, we're doing online learning....So yeah that should be fun lol. No for real, I'm looking forward to it, but I know it's going to be a challenge. I've dabbled with the idea of home schooling forever, but never took the leap, now I got pushed or shoved lol. So, it is what it is. We will make the best of it. *Fingers crossed* No, really I think we will be just fine.

    I have been playing with my scrappy things. I have rearranged my scrappy space, like 3 times lol. But I haven't really been posting anything. So I figured it was about time. I am trying to get back to some kind of normal in my life and I also kind of miss it.


    I'm not on any design teams at the moment, so this isn't for a DT, but I did use a lot of my Bella Blvd stash on this layout, Illustrated Faith paints too. Really I started this with the paper with the crosses on it. I had pulled out my IF paints and started painting some of the crosses. I had my goofy, but very poor quality, snapchat pics and decided to scrap them.
    I have been working on myself in many ways, health, attitude, emotional and more. It's been needed. So when I remembered I had some of these things in my stash still, I decided to use them.


    I started adding things here and there, layering die cuts, tags, stickers and knew I wanted to use some washi. But I wanted more color, So I grabbed an old gift card, scrapped it in some of my left over pain and scrapped it across a few places on my layout, where I had already had a few things clustered around.

    I hit the paint with my heat gun for a minute and then went back to re stacking everything. Adding little things here and there that I found in the collections.


    I knew my title when I started so I added it, some splatters and that was it. Now looking at it, I think I might go back and add some stitching, but we will see lol. I always think there is something else I can do to it to give it a little more umph. 

    Well I hope y'all liked my layout and I hope to keep sharing more with y'all coming up again soon along with more rambling about life and the new normal that were all having to learn lol. Hope all is well with everyone and hey, if your not a blog reader, head over to instagram and check out my page there:https://www.instagram.com/mother0froyalty/?hl=en

Then you don't have to read all the ramblings to see the layout lol. I also have a facebook page for all things scrappy, you can swing by and check that out too if you want:https://www.facebook.com/scrappinmylittleroyals


Friday, September 6, 2019

Sweet sweet summer / Bella Blvd

Good morning everyone!!
I'm here this morning sharing a new layout that I made with the new Squeeze the day collection from Bella Blvd. 
This week my assignment was to scrapbook summer memories. And that's just what I did with this goofy picture of my daughter.
 We have a summer tradition of going to our local zoo every summer, sweating down like crazy while walking around looking at the animals and stopping at every mister around the zoo as we go lol. So by the end we look completely sloppy, but we have had a blast with each other

I started my layout with a sheet of white cardstock, I had already decided I wanted to go for a grid design, so I chose a few patterned paper from the Squeeze the day collection and the Bella Besties collection. I laid them out on my layout and pulled out the ephemera words and icons from the Squeeze the day collection.

I have been eyeing all the cute little rainbows in this collection and I thought this would be a great layout to use them on. I pulled a bunch of the rainbows from the packs, some from the sticker sheet and a few tags along with those and started layering them in the squares.

 
Once I had everything layered on the separate squares, I went to ruffling all the edges up and adding 3D foam adhesive and popping a few things up. I pulled some crape paper from my scrappy stash and added some coming out from under one of the rainbows, around one of the scalloped circle stickers and to the left, behind my photo. I thought it added some good texture. I thought there was to much white and there was enough room to cut it off and add a pop of something else. I pulled some papers from Bella besties, laid them behind my layout till I decided on one. I cut 3 of the sides down and added my Punch paper to the left of my layout and was done.

Squeeze the day collection: 6x6 paper pad, Daily Details 12x12 paper, Ephemera Icons, Ephemera Words, Doohickey sticker sheet, Ciao Chip icons
Bella Besties collection: 6x6 paper pad, Graph and dot 12x12 Punch paper

Monday, August 26, 2019

Fruity little love / Bella Blvd DT

Good morning everyone!!
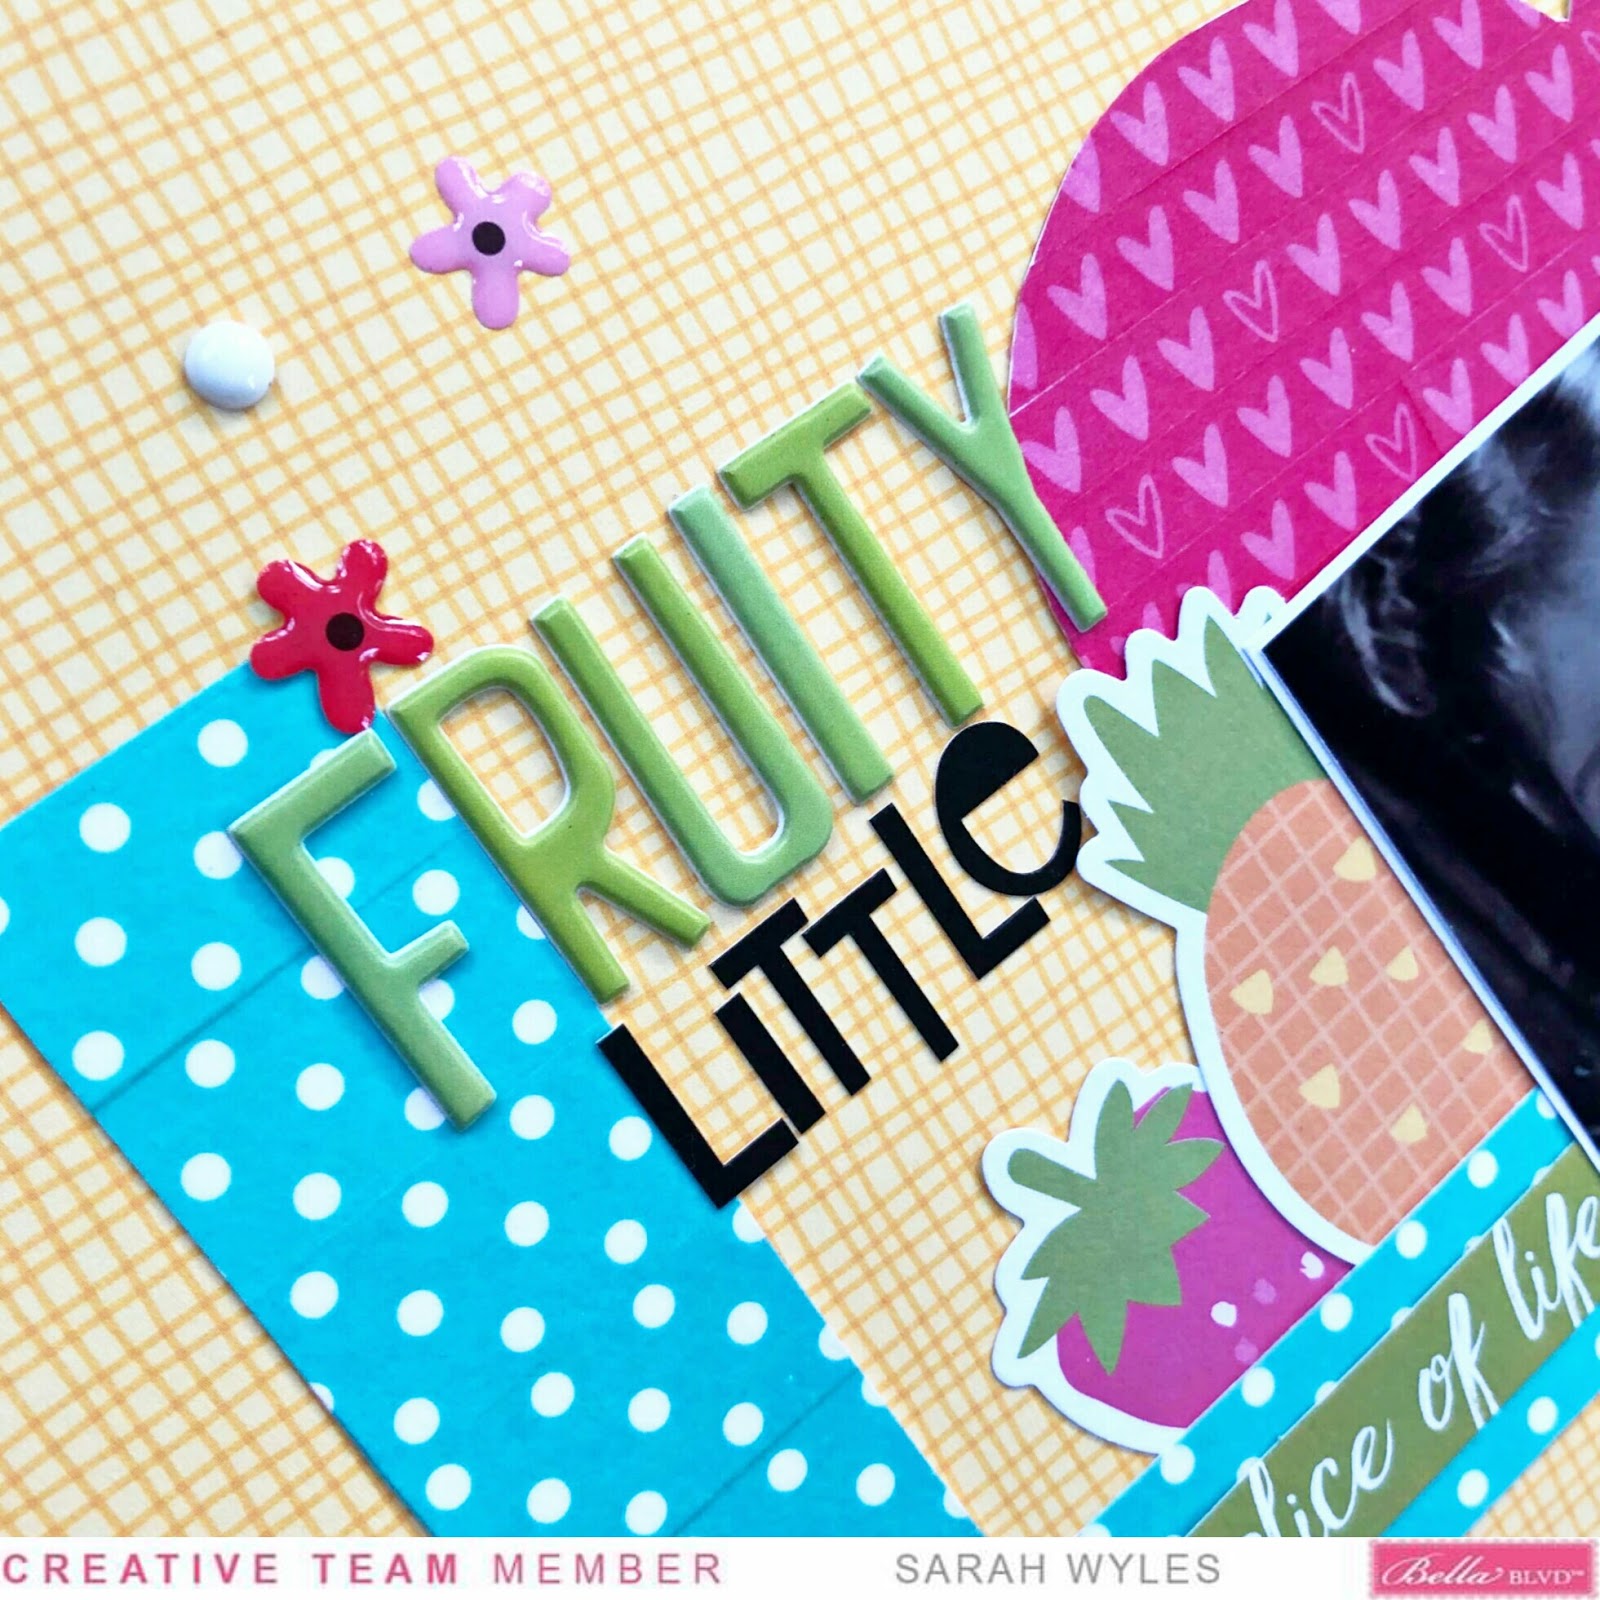
Today I'm sharing a layout with you for the Bella Blvd design team and my assignment this week was to use at least 4 different washi tapes on a layout. My problem was finding just 4 lol.
Well I finally found the 4 that I wanted to use, I already had an idea of what I wanted to do, so I cut out a cut-file and then went to covering it with the washi tapes I had chosen. I used some of the new ones from the Squeeze the day collection and a few others I had in my stash of Bella goodies. 
I grabbed the Bella Besties and went through them, trying to find just the right color for my background and landed on bell pepper. I loved the brightness it brought to the layout and I wanted this layout to be fun and bright, just like my little goofy girl in the pictures. 
I laid my cut-file on the background I had chose, backed my photos and then decided I wanted something to the right of my layout, a way to use another washi. So I grabbed one of my punched and cut a boarder down the side and laid a few strips of break rules washi and attached it to the bell pepper paper. 
Once I did that, I backed my photos with some white cardstock, tucked them into my cut-file and then went to playing with all the fun embellishments that came along with the Squeeze the day collection
I tucked some of the fruit ephemera around the layout, making little clusters and then moved on to the word ephemera and added bits and pieces of those around the layout as well. 
I pulled some of the Heart hugs out and used some of the enamel dots off the sheet and placed them around the layout, played with a few of the stickers from the Doohicky sticker sheet and then jumped into the ciao chips and epoxy icons.
Those are just so stinking cute!! I pulled some of the Florence and Wonky alphas and finished off my title and was finished with the layout!
I cant wait to play even more with this collection! Its so bright and playful and there are so many things you can do with it!  
I hope you come back and check out what I get up to with this collection and others from Bella, you can check me out on instagram too, to see more of what I do!


Squeeze the day collection: Ephemera Icons, Ephemera words, Doohicky sticker sheet, Ciao Chip icons, Epoxy Icons, Fresh and Fab washi, Sweetness washi
Ice dot washi, Break rules washi
Bella Besties Graph and Dot: Bell Pepper
Heart Hugs: Black and white
Florence alphas: Black
Wonky alphas: Pickle Juice


Thursday, August 8, 2019

Explore, Happy, Play / Bella Blvd DT

Good morning everyone!!
I'm going to be sharing a layout with Bella Blvds new Squeeze the day collection!! I mean, this collection is so amazing and fresh! I just love it!!


Good morning everyone!!
PicsArt_07-31-02.56.05
Ok not only do I love the new Squeeze the day collection, with its bright colors and happy patterns, but I really have a thing for the bella invisables! I think I may have one or two left, I love them added in as a layer on a layout. This one was a calendar, but you dont have to use it that way at all. I just love the way it adds more to the background.
PicsArt_07-31-02.59.40
 I started with a Bella Besties for my background. I knew I wanted to use the invisible on my background too, so I actually started building my layout on it, before ever sticking anything to my background paper. I figured that doing it this way, I would be able to build my layout and then decided on what color I wanted the background to be, what complimented my layout.
I started with my pictures. I had three for this layout, I just had to decide if I wanted them to go vertical or horizontal. I ended up deciding to have them go with them horizontal. I backed each photo with a different patterned paper and then decide I wanted a patterned paper running behind my photos. And I love rainbows! So I went with that, it had a lot of white and pops of all the colors in the collection, so anything from the collection would work!
PicsArt_07-31-02.58.25
Once I chose the rainbow picture, I popped two of my photos up on 3d foam and stuck them all down. Then came trying to decide what embellishments I was going to use. And if you haven't seen this  collection, OH WOW are there a ton of ephemera pieces, stickers and all the epoxy pieces!! So for me it was hard not to use everything!!
I chose some of the pieces I wanted to use, set them aside and pulled out my acrylic words. This week we were to use acrylic words on out layout. Well I chose three different ones to use. It was super easy to chose the words for my title too. We were at the zoo in these pictures and we had do much fun while we were there. My youngest daughter got to to ride the carousel for the first time and oh did she love it, she didn't want to get off it! One of my other daughters wasn't so sure about it though and she held on for dear life. But it was all so much fun.
PicsArt_07-31-02.56.50
I picked where I wanted my title to go, I started from the top with the largest word and a white one, knowing that I had two white acrylic words and a green one, I decided to alternate them. So I placed them and started to embellish around my layout. I added a cluster up to the top left. I added some of the tags, epoxy fruit, ephemera heart and a sticker here and there. I did the same to the right of the photos and than down at the very bottom below the word play. Once I was happy with everything, I went through the Bella besties, sliding different colors behind my invisible, until I chose the ice color. I adheared everything to the background paper and was done.
Bella Supply
Bella Besties: Graph&Dot Ice
Squeeze the day collection: Sweet skies patterned paper, 6x6 paper pad, ephemera words, ephemera icons, doohicky sticker sheet, epoxy icons
Invisibles calendar
Acrylic words: Explore, Play
Acrylic word-Wish big: Happy 
Bella Blog bottom

Saturday, July 20, 2019

Birthday Boy / Bella Blvd DT

 Good morning everyone!
Sarah back here today to share with you a layout I made about one of my little guys and his birthday. You will notice with this layout, I used color photos. I know crazy!! I never use color photos. I used color photos this time because its the only way I had these. I lost my SD card in one of my moves and had these printed from years ago, so I decided to use them the way they were.
He turned 3 and was so sick, but his fever had finally broke so I wanted to do a little something before his birthday party the next weekend. So we went and got some cupcakes and his and his brother had a cupcake war in the front yard and they had a blast!

 I started this layout by actually getting the photos arranged the way I wanted, stuck them together and went to adding the layers behind them. I grabbed the ephemera packs that went with the Wish Big boy collection, along with the ciao chip icons and started to pull pieces that I thought I might wanna use on this layout. Once I did that I thought, well maybe I should get the background started. I was doing everything backwards with this layout, lol.
I pulled a few papers and decided I wanted this layout to be centered across the middle of the page. I chose the papers I wanted and went to arranging them the way I wanted. I changed it a  few times, but decided on the cute little animals in the back bottom layer. I wanted the stripes, I love pattern, so I knew I wanted that paper as well, but there needed to be a little break between the two busy layers, so I grabbed the teal tone on tone paper and added a strip of that between the layers and stuck it down and ruffled up the edges of them before I moved on.

Ok so I have the background done and had my photos with there layers, so I added 3D adhesive behind those and placed them to the right of the layout, since my son was facing the left in one photo and straight on in the other. 
So now I had my photos where I wanted them and knew I could start embellishing and that's what I did. I soo wanted to use that cute little dino with his cute little party hat on, so I tucked him under my photo to the left, added a cake and some balloons and moved on to adding cupcakes to the right of my photos and some little hearts. I loved the sayings on the stickers and ephemera pieces so I decided to pop some of those in there as well. I added two tabs at the top of my photo cluster and then went for the title. I love, love , love Bellas acrylic words and this made my title extremely easy! I added it and then added boy on top of the acrylic Birthday word, with some of the Illustrated Faith homespum alpha stickers. Popped a few of the star stickers from the sticky mix sheet and that was it for this layout!

Wish Big boy collection: 
Dinotastic paper, Blow them out paper, Boarders paper, Mack a wish paper, Happy birthday paper
Ephemera words, ephemera, Ciao chip icons, Sticky mix cardstock stickers
Acrylic word: Birthday
Illustrated Faith: Homespun cardstock stickers: Bananas for you


Monday, July 15, 2019

Paper Sweeties July 2019 New release party

Good morning everyone,
 I'm back this morning to share another layout with you using the cute new stamps and sweet cuts by Paper Sweeties.
I started this layout by stamping those cute little fish on the background, I stamped quite a few but some got covered up when I started to add the papers and embellishments. 
I don't usually use colored photos but I have been lately. There have been a few layouts lately that I have used color pictures on them, I had found a bunch of old photos that I don't have copies of, so I'm using the original, and with these papers and stamps, it works great!
I had already stamped a bunch of little fishys, added a white mat around my photo and popped it up on 3D foam, so I started on my background. 
I decided I wanted my picture towards the top and on the left because of the way he was looking. So I cut some paper strips and grabbed a few boarder stickers and layered them on the left side, ruffled the edges up and placed them down.

Once I had the paper strips down, I stuck my photo down on top of them and started water coloring the cute stamps in. This way they match the papers I'm working with too. I have to say that's one of the major things I love about using stamps!!
 I added the title to the right of the photo, a mix of chipboard letters and some stickers, then I tucked that cute little treasure chest under the title to the right and a little pirate star down at the bottom of the title and under the photo. I added some cute little stripped and dotted hearts here and there.
Then I bounced to the bottom left corner and started adding embellishments there. I knew I wanted that tag, I tucked a hears and that cute scalloped circle behind it. I stamped sun kissed nose to the tag and along the paper strips. I knew that cute little pirate starfish would add a pop of yellow to the bottom of the layout, so I popped that cute little guy up on some foam adhesive. To finish off the layout I decided to add some stamped bubbles and then some teal and blue splatters. 
I love what these stamps added to the layout, the cutness and whimsy, were just perfect!!


Make sure you go check out the rest of the ladies projects too!! 


Sunday, July 14, 2019

Paper Sweeties July 2019 New Release Sneak Peeks!

Good morning everyone!!
Today I'm here to show you a sneak peek of Julys new stamps and dies.
I wanted to use this picture of my my son and me, it was his 1st time to a beach and he was so excited. He was about a year and a half old and he was just so cute! So this months stamps went fantastically with this layout, they are cute and whimsical and you can make them any color you want!

I decided to cut my picture into a circle, so I thought why not add a bunch more circles to the layout and by doing this that would give me placed to pop stuff behind and on top of around the layout.

I love the little little pirate starfish, he is so cute and can be used so may ways and the fact that you can color him and all the other stamps, anyway you want is so awesome!! The jellyfish was fun to play with as well, along with that cute little treasure chest!!
I really didn't use many embellishments on this layout because I wanted to use these cute little things. I love the whimsy it adds and the cuteness to it. 
Thank you for stopping by to check it out and I hope you make sure to check out the rest of the girls creations as well.