Hello everyone!! So, I was completely nervous about this. I had played with TN’s in the past, but just for my own eyes and no one else’s. But really, I had decided not to even try because I do more traditional 12x12 layouts more. But man, do I love playing in a TN, planner, making mini albums and playing with mixed media and I rarely share much of it. But I got the awesome opportunity to be on this great team,
Journals For Life and I thought, well maybe this is a sign lol. Yeah, sometimes I am that person. But I’m glad I did it and that the owner took the chance on me.
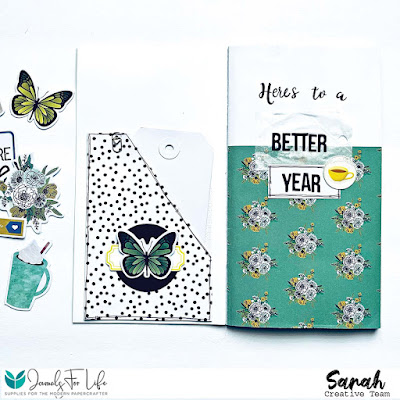
I wanted to share my progression in my real first TN and I wanted to share it with y’all too. The cover is really basic, not a ton to it. But I wanted to keep it that way for the beginning of 2022. I’m trying to look on the bright side and hope to enjoy whatever journey 2022 takes me and my family on.
I loved the washi that came in the kit and had to use it. I am a coffee-aholic lol. I had to use that, cause there will be a lot of coffee in 2022, just as there has been in the past! I used that pretty heart from the kits ephemera pack and pulled the phrase sticker and the number stickers from my stash and that was that. Cover done.
I moved to the inside. Now before I started, I did my best not to look at anymore TN’s because I didn’t want to be influenced by anyone else’s designs. But I had seen plenty on Instagram, Pinterest and more lol. But I made it a point not to go looking for them. I knew I wanted a little pocket on my inside cover to store extra tags, this way I didn’t have to go looking when I was in the process of playing, and I wanted a place to put some other item I may not want to put on a page.
I ran a die through my sizzix and popped my pocket on the inside page, drew a little line on the edges and poured out the ephemera to add something to the pocket. I cut out a circle, popped a little label through the center and then added that pretty little butterfly in the center.
On the first page, or title page? IDK, I thought I would try my hand at some lettering and mixing it with some stickers. I also had the bright idea to try and use some of my vellum as a tag, not sure it was the best idea, but it was stuck down, so yeah there it is lol. But I went with heres to a better year, and I so hope it is! I put one of the clear stickers from the kit on a piece of white cardstock, I thought I was going to cut it out, but decided to use a clear epoxy sticker and make a 3D embellishment for this page, yes more coffee lol.
I know this really isn’t that much, but I have moved forward and have done some more. I will share more this week and see what y’all think. Do you have any suggestions? Well, I hope you liked what I did and I hope you’ll come back and see what else I come up with! I have to say I think I did a bit better, not to toot my own horn, but I kind of just let go and had some fun and I think the more comfortable I get with it the more I will be happier with it. Make sure to go check out the Journals.For.Life Instagram and blog to see what all the other ladies are going with the kits too!


