Showing posts with label The Cut Shoppe. Show all posts

Wednesday, April 19, 2017

Hello Flawless/Creating with sketches

Hello everyone!! Sarah here today to share with you my take on this months sketch, #305 and oh man did I love this one!! And I loved this months sponsors too! The Cut Shoppe , Ashley has so many different cut files, I loved working with them! Here's my layout.


I started my layout with a white background at first and then decided to change it up to a wood grain background. I wanted my cut files to pop a little more and on the white background it just wasn't happening.


I added a little a few layers behind my photos and then went to backing my cutfiles. After I backed my cutfiles I placed them on my background where I wanted them and started to layers my photos with other cutfiles.


Then I started to add little embellishments here and there, with a bit of dimension to some of them and some wood pieces, a rub on title and added a few sequins.

We would love to see what you create with this sketch too, so make sure to share your creations on Instagram  using #creatingwithsketches  I hope you enjoyed my take on this months sketch and I would love for you to follow me on Instagram
Thanks so much and cant wait to see what you create!!
-Sarah
Wednesday, March 22, 2017

Good morning everyone!! I hope you're doing good today!
Well its Sarah here again to share my take on sketch #304!


I started my layout by grabbing the Maggie Holmes Shine collection from my stash and the goofy pictures of me playing on snapchat.


I wanted to do mine a little different so I went with circles and a cut-file for one of my layers. I knew I wanted the cut-file from the Cut Shoppe to be my 1st layer behind my photo, so I started out with backing it and then adding pop dots to the back to five some dimension.


After I did that I grabbed that pretty black and white stripped paper and the blue dotted paper and cut them into circles about the same size.  I added a doily in between them from Pretty little studios. I love those doilies! I added all the papers, cut-file and doily down at an angle, like the sketch. I added a tag in from the ephemera pack that went along with this collection and backed another circle with some of the same patterned paper as the res of the cut-file and slid it behind the tag.


I decided I wanted to add a few floral stickers and stems from the ephemera pack, I grabbed a few little chipboard hearts from the chipboard sheet too. I love that camera from the sticker sheet but have never used it and with this being pictures of me, I figured it would work great! lol So I added that and placed my title on top. To finish my layout off I grabbed my Heidi Swapp black color shine and did a bit of splattering and called it done.

I hope you enjoyed seeing my take on this fun sketch and I hope you play along with us too!! Make sure to share your creations with us on Instagram @creativescrappers #creatingwithsketches
I would love for you to check out my Instagram too!

Sunday, December 25, 2016

Pretty Little Studio/Be Merry Be Bright 12x12

Good morning everyone!! Can you believe its already Christmas Eve?
Well today I wanted to share a layout I made using the Tinsel Town collection by Ashley Horton.


I got a picture of my Christmas tree from this year and thought it would go great with this collection, so I decided to scrap it. I used a cut-file from Ashley Hortons, The Cut Shoppe, Christmas Magic and cut the title out.


I backed it with pieces from the Tinsel Town collection and started layering behind my photo. I added a few pieces from a cut apart sheet and a few bits and pieces from an ephemera pack.


I added a small amount of journaling at the bottom of my photo about what year this was and a little blurb about my tree this year, finished off my little embellishment cluster and decided to add a small strip of paper to the bottom of the page and then moved on to add a wood veneer tree and a few more pieces from an ephemera pack.


To finish it off I added some splatters of Heidi Swapp color shine in gold lame and that was it. a quick simple layout, showcasing my Christmas tree. Thanks so much for coming by to check out this layout!

Pretty Little Studio products used:


Thursday, December 22, 2016

Cocoa Daisy designer challenge

Good afternoon everyone! Sorry I'm a bit late getting this up today but it has been CRAZY! lol
We have had so much running around going on and family going here and there and I don't expect it'll slow down till after Christmas, but thats ok with me. I'm just happy to have all this family around! What about y'all?? Lots going on there?

Well today I wanted to share a layout I created to play along with this months Cocoa Daisy designer challenge. Oh and a quick mention, Cocoa Daisy has now set up a new facebook page for the monthly challenges, it makes it a bit easier to play along, so we hope to see you over there! Here it is for you, Cocoa Daisy Challenge facebook page . 


So this months challenge is to scrapbook your favorite memory from 2016. So this is what I scrapped about, This was our surprise in 2016.  And a fantastic one at that! We found out that we were pregnant with out 5th child and it was amazing. 
These are the 1st ultrasound pics, we didnt get to get in to ultrasound until further in to the pregnancy but that was ok, we knew she was ok.

I used the main kit, moments, and some layers made with the DITL kit and a cut file from Ashley Hortons, The Cut Shoppe.

We would love for you to play along and let us see your creations over on the facebook page or even in the Cocoa Daisy forums on our site. 
Thanks so much for stopping by and seeing what I had made today!


Monday, December 12, 2016

Pretty little Studio / I just love to smile

Good morning everyone!! Happy Monday! Its the beginning to a new week and I thought I'd share a new project that I made with the lovely Tinsel Town collection created by Ashley Horton.


This is a very simple layout but I loved the cute little picture of me and my daughter from last winter and her little antlers, lol. After I chose my picture, I went for my Silhouette, a piece of card stock and the Stained Glass and The Buddy the Elf cut-files from The Cut Shoppe.


I sewed the Stained glass cut-file to the background, splattered it with white paint. Then I layered patterned papers behind my photo and adhered it down. I cut the Buddy the Elf cut-file and put my title down. 


After that I grabbed the cute paper with all the circles on it and started punching some of the circles out. I popped a few up on 3D adhesive, with some thread messyness behind them.
I added ephemera pieces, love the Buck head!! And you get it in different colors! lol I was good an only added one flair button, I love them and need more!!!
Very simple, 30 minutes to make but I love it!!


Pretty Little Studio products used:

Friday, December 9, 2016

Pretty Little Studio/The Cut Shoppe swap

Happy Friday morning everyone!! Just a few more hours and the weekend starts!! Woot Woot! lol
Well I am here today to share a layout I created for the Pretty Little Studio/The Cut Shoppe product swap.

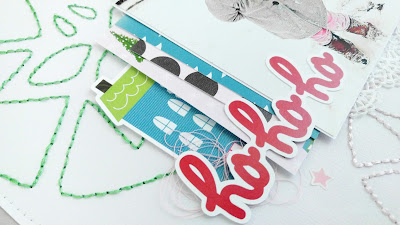
I used the Stained glass cut file, but instead of actually cutting it out I separated it in my silhouette software and placed 3 around my page in different sizes and sewed them onto the page in different colors that matched the Tinsel Town collection.


I had already picked out my photo, a picture of one of my little ones playing in the snow last year, she loved the snow! All the kiddos did. After I sewed the stained glass stars on the page I layered some of the pretty Tinsel town papers behind the photo.


Then I started adding the cute houses that came in one of the ephemera packages, aren't they just so cute!


I added the hohoho die-cut as my title. I wanted a few more stars on my layout, so I grabbed the star sticker sheet and added a few of those and a few of the die-cut stars. I finished it off adding a the snow much fun from the cut apart sheet and that was it. 
Everything in this collection goes so well together that the layout came together in no time! Sewing took a bit and it made my fingers a bit sore, but it was worth it!


Pretty little studio products used: