Showing posts with label Dream Big. Show all posts

Monday, August 7, 2017

Love Love love Stay curious/ Pretty Little Studio DT

Good morning everyone! Sarah here this morning to share with you a little wall decor I made for my girls room.


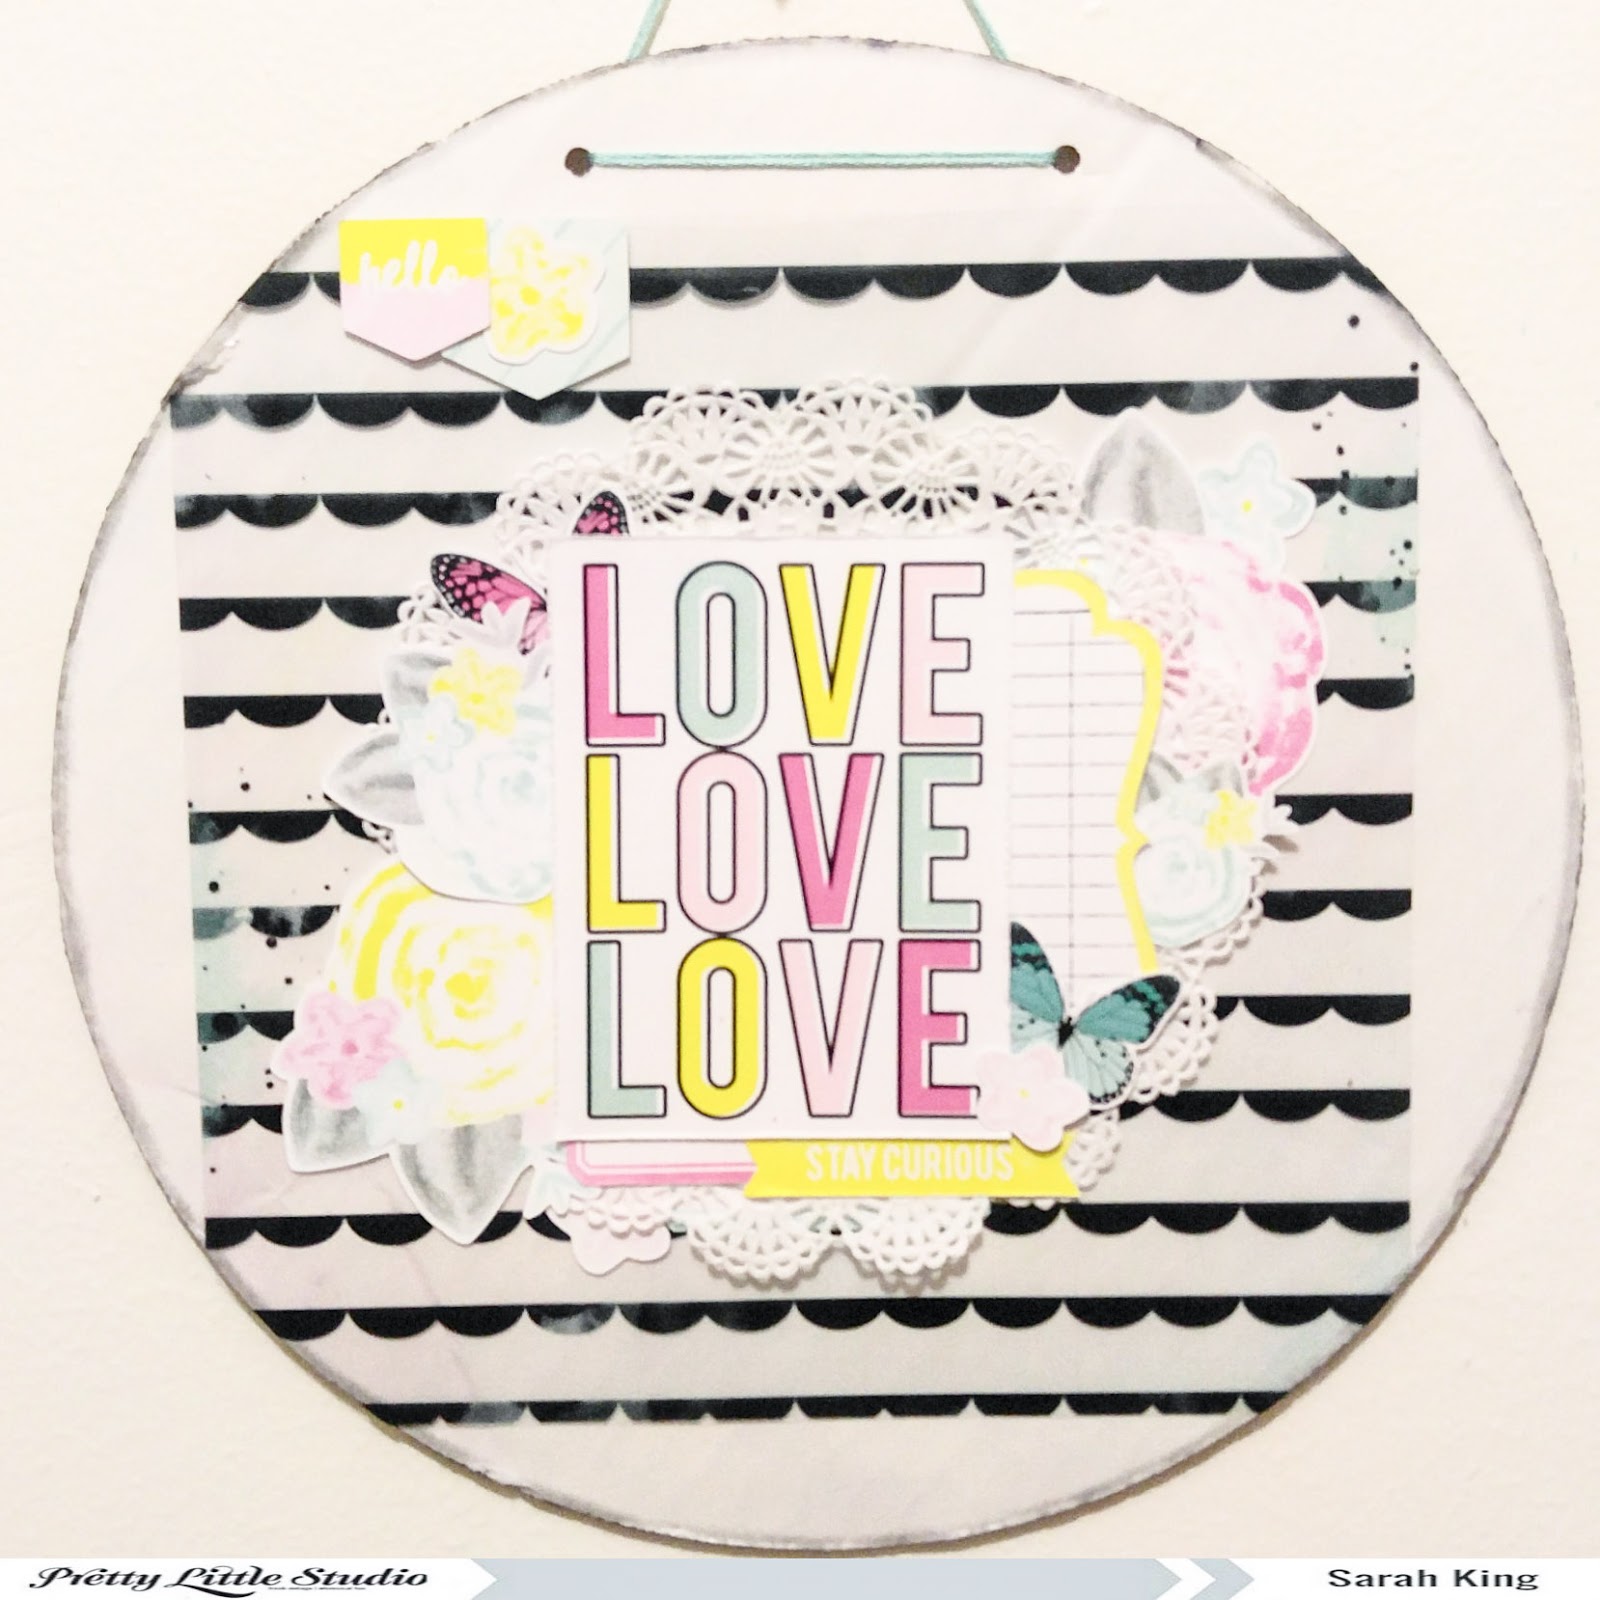
I love the Dream Big collection! The colors are beautiful and I love all the bits and pieces that go with it! I had this sign in my scrappy stash and thought it would work perfect for a cute little girly sign, So I pulled out this collection and started playing. I wanted to use that scalloped clear sheet, so I added that as my back drop and worked from there.
I love the delicate doilies that you can find in the shop, so I of course had to use one of those!


I pulled this out this journaling card and used it for my main focus, knowing I was going to add a little more to it, title wise. I cut that yellow bracket piece in half and added it behind the journaling card. Then I decided I didn't want everything to be flat, so I added foam adhesive behind my journaling card and started to add the pretty florals on both sides. I went on and added a few little labels to the bottom of the journaling card and then added in my stay curious flag. I finished everything off by adding a few butterflies and using my distress ink around the side of the whole things. 


Pretty little studio products used:


Monday, June 19, 2017

Ain't life grand / 12x12 layout

Good morning everyone! 
Ugh! the weekend is over and a new week begins, but really I'm ok with that, we have some fun planned this week and as long as the weather stays nice!


This week I started out with the Dream Big collection sitting on my desk. I went threw and pulled out some of the blues and yellows. I loved the patterned paper with the black circles with white speckles, so I grabbed that one to and that was the pallet for my page.
I chose a larger photo for this layout, I've been seeing it everywhere lately.I didn't go quite as big as some, but a 5x7 was big for me!lol I popped out a few of the black circles and then went back and punched out some of the yellow and blue in circles too.
I layered a bracket card behind my photo and layered a few papers behind my photo. I wanted more at the bottom of the photo so I pulled out my labels and layered a few of those there too. I also cut a strip off of my Never forget clear page and sewed it to the right side of the layout for a pop of color.


I knew I wanted to wanted my title to the left of the photo, one reason I made the layered cluster there. I pulled in a few things from the Ain't life grand collection. I loved the word die-cuts and really wanted to use this one on my little guys layout. I finished up my layout by adding come silver splatters and a bit of sewing and that was it. 
This layout wasn't something that was a big grand thing, but I love how the picture was front and center with little pops of color.
Hope your week starts good and that you get some scrappy time this week too!


Pretty Little Studio Products used:


Sunday, June 11, 2017

Dream Big - Fairytale club DT

Good morning everyone! I'm here this morning to share my second layout for the Fairytale club and I just love it all!! I have such a hard time choosing what to use, or what not to use I guess, since I have a hard time not using it all!!


I started with my photo and this great cut-file. I grabbed my cardstock and sprinkled some Gold color shine around it. While the color shine was drying, I backed the feathers on my dream catcher. Once it was done with backing the feathers I adhered  the feather portion of the cut file down and started layering papers behind my picture.


I grabbed a planner page and fussy cut that adorable unicorn out and layered it on the right side of the photo and added a few pretty little roses from the ephemera pack. Then slid it under the moon. Once I got the photo placed down where I wanted it, I glued the rest of the moon down. Then came the pretty sequins! I pulled almost all the gold sequins out and glued them down around the dream catcher.


I liked the layout, but wanted more color to it, so I trimmed down two sides and backed it with that beautiful, two colored dotted paper. I cut a triangle from one of the planner inserts, I loved the bows! I put that to the bottom right of the layout, trimmed down around the outside of a circle label I had already used the inside to, punched out the xo from the paper I cut the unicorn down from and then added that cute unicorn ephemera piece. I wanted one last touch, and added the So lovely word sticker and was done.

I hope you enjoyed this layout because I loved making it and I hope your enjoying playing with this beautiful kit!!