Saturday, December 23, 2017

Scrappy Saturday- I love this girl/SpiegelmomScraps DT

Hello everyone!!
How excited are you that Christmas is only a few days away!!! My kiddos are so excited! lol Anyways.... This week I'm scraplifting the awesome Missy Whidden!
This is the layout of Missys that I decided to scraplift. I wanted to go a different way since I've been on a roll of scrapping circles lol. So I chose a grid. I will say that I did a lose scraplift of this layout lol.

I loved the Birthdays&Balloons sequin mix and Crate papers Cute Girl collection went great with it! I had already picked out my pictures of my niece, shes so pretty, but I swipped her snapchat pics to scrap lol. 

I started my layout by pulling out some of my shimmerz that matched the colors in the sequins and in the paper collection and using the packaging technique  around my layout like Missy had.  Once I had the colors where I wanted them and let them dry, I added the machine stitching like she had.

I kept my grid loser then Missy did, but I knew I wanted it to cover more of the page, I was trying not to have so much white space. But after knowing where I wanted my pictures, I started my paper layering in the other two spaces and then behind my photos too.

I went in as I was adding the layers and added some little thread nests for some more texture and because Missy had added them.

After adding little puffy stickers here and there and the thread nests, I moved on to adding all the pretty shinies! Birthdays & Balloons sequin mix has so many colors and the shine on some of them are just different. I'm guessing its because some of them are see threw and some aren't, but I love the different shines they give!
Thanks so much for checking out this layout, and make sure to check out all the great layouts that all the other Sparklers made too and make sure to check out what Missy has made too! 
Thursday, December 21, 2017

Bella Blvd December Documented free standing album

Bella Blvd/Santa Stops here: Santa Stops here free standing album kit, Ciao Chips, Fundamentals, Ephemera, Pennants, Acrylic word, Illustrated Faith: Homespun Apple of my eye, Hey Sugar Sugar, Holly Jolly Christmas: Gift Tags, Festive Mini bows, Make your mark 6x8 clear cuts pad

Good morning everyone!! Sarah here this morning with my first post for the Bella team and I am so excited!! I pulled out my Santa Stops here free standing album kit and decided to turn it into my December Documented album for this year. Every year when I make one of these, I go through and do my prep work and add more in as I go. I always like to keep it simple at first and add more embellishments on top of my pictures. Be warned, there will be a major picture over load in this post! lol

I go through and add my photos along with embellishments and I have to say for me, I love doing the whole album but the embellishing is my all time favorite. I add layers behind some of my photos before putting them down, then add my stickers and other pretties.I think my main problem is I always want to add to much and my album is heavier on one side. 


As Im going through and making my album I include all of our yearly traditions and then our day to day as well. Like on this page, I had my first Peppermint mocha from Starbucks, my mom and we went for one while we were out doing a little shopping, she is also the one who caught the picture of me, so I got it from here and added it in and kept the little cozy from around my cup, punched a few holes and added it in to the album.

And when I get to pages where I can add some more journaling in where I already know we have things planned I get a little of that done and in my album until I can print my pictures.


Going through my prep pages you'll see where I dont have some of my daily numbers stuck down. I do this so that If I need to move it because I have more that I want to add to a day then I can do that and not worry about having to pull anything up and mess something up, even though I always know theres cute thins I can cover a boo boo with.

I do plan on sharing my finished album during the first week of January on my Instagram with all the beautiful Bella Blvd products!!

Saturday, December 2, 2017

Scrappy Saturday- Christmas Kitty SpieglemomScraps DT

Good morning scrappy friends! I hope your weekend has been going good! We have a few Christmas parades to go to this weekend and the kids are so excited for them!
Today Im here to share with you a layout I made using some beautiful Sequins and a collection from Bella Blvd, Holly Jolly Christmas. I used Shabby Chic Christmas Some navy sequins from Puppy dog Tails and Hustle Bustle and these sequin collections went perfectly with the Bella collection I chose to use!
This month were also focusing on using our tools. Well to be honest, I dont have a lot of scrappy tools. I used my scissors a lot, my sewing machine and my punches. So I decided to make a big shaker pocket for this layout. I used an 8.5x11 page protector and filled it with my pretty sequins and sewed it shut. I loved all the colors mixed together and that there was a large amount of them on my layout, the more sequins the better, lol!

 I never start with my sequins, I always save them for last, just because I love to add all the pretty sparkles, but this time I started with my large shaker pocket.
When I had my shaker pocket down, I pulled out papers from Holly Jolly Christmas and started to cut some triangles in different sizes to make into Christmas trees.

When I had the trees cut to the sizes I wanted I added a little adhesive to the back, not a lot because I knew I  wanted to sew threw them. I matted my photo of my kitty under the tree sleeping, with some of the red that I used for some of the trees and popped it up on 3d adhesive and stuck it down.
I sewed through my trees and lifted there sides up a bit to add some dimension and moved to my title. I pulled the word Christmas from the die cut pack from this collection and added it down under the middle of my photo and added kitty in some green alphas. I thought I was done but I saw those cute bows clips and decided I would add a few to the tops of my trees. So I popped them off there clips and added two to my trees and that was it for me!
I love, love ,love these sequin mixes I used! I think Hustle Bustle is one of my favs right now, and all three sequin mixes worked great with this collection! Thanks for stopping by and checking out what I made today and I hope you have a great rest of your weekend!!

Sunday, November 26, 2017

Hello Daydreamer-Pretty Little Studio DT

Good morning everyone!! 
Im Here to share another layout with you and this time I'm using the With All my Heart collection.
I started my layout with a picture in mind, the one shown above. It was my youngest daughters birthday, we had a little party for her and she had a blast. We ate cake and did presents and after that we turned the sprinkler on and played in it.
I had picked the collection to use and decided I wanted to use circles as my focus on this layout. I I went to punching them out.

I chose a paper for my background and covered it with a sheet of vellum, to soften it up. I chose where I wanted my photo and went to laying out where I wanted the little circles in all the pretty colors and patterns.
Then I went on to deciding what was going to go behind my photo. I knew I wanted to use a doily, so I added that right off the bat. Then went in and grabbed my floral die-cuts, some labels and a tag and started layering.

Finishing off my layout, I grabbed a die cut word and added some of my silver glitter thickers and added my title to the bottom left of my layout. I tucked in a few heart die-cuts and a few more circles here and there and was done.

Pretty Little Studio Products used:

Saturday, November 25, 2017

Scrappy Saturday- Love this guy/SpiegleMomScraps DT

Good morning everyone!! I'm here this morning to share a new layout with you. Y'all have probably already seen this sketch but thought I'd share it again to show you what I got my inspiration from.
I loved this sketch as soon as I saw it!! I started with a sheet of white cardstock, I lightly drew on a circle and grabbed Aint life Grand from my stash and started to punch out different sized circles.
I laid the circles I punched out around the circle I had drawn on, but wanted more circles, so I grabbed the circle stickers and die cuts from this collection and layered them in with the other circles. When I had them all where I wanted them I ran my page threw my sewing machine.

Once I had my circles stitched down and a few messy circles sewn, I grabbed my photo and added a few paper layers behind it. I messed up the edges some and then popped it all up on 3D foam, added a xoxoxo tab and stuck it down. I grabbed some word stickers from my stash and added them above and below my photo and moved onto adding my sequins! 

To finish my layout, I reached into my lovely basket of sequin packets and grabbed out Puppy Dog Tails and Hustle Bustle. The colors were perfect, so I started to add them around my sewn circles.  I loved the shine it added to my layout and the color pops it added to the top of my layout too! I decided to add a navy polkadot paper as a boarder around my whole layout and added a little Heidi Swapp gold color shine splatters and was done!
Thanks so much for checking out my layout and make sure to check out what all the other Sparklers make too!! Head over to the shop and check out all the new sequins too!!

Tuesday, November 21, 2017

Pinsperation-Hay Bear-Pretty Little Studio DT

Good morning everyone! 
Sarah here this morning to share another layout I made using some pretty products from Pretty Little Studios and along with a little pinterest inspiration! 
I chose to use colors on the lighter and brighter side, with a little black thrown in on my layout. I used the Potpourri collection for this layout, I loved the colors in the collection, they went great for a fall layout and thats what I was doing.
I had ordered the swatch pack and wanted to use them on this layout, so I pulled them out, chose the ones I wanted to use and started laying them out on my cardstock. I set it up in a pyramid shape with my photo at the top.


I grabbed the beautiful vellum paper, Pile of leaves out and did a little cutting, well I cut all the pretty leaves out and tucked them behind my photo instead of adding a bunch of layers. I tucked them behind some of the swatches at the bottom of the layout too. I liked the little bit of dimension that it added to the layout, I also decided to ruff up the edges of my swatches. 

To finish my layout I grabbed the Thankful clear word stickers and tucked some of the black leaves around the layout too. I added my title to the bottom with some thickers from my stash and did a little play on words. Then I grabbed some shimmerz and added some little dots around the cluster of leaves. And that finished it all off for me.


Pretty Little Studio Products used:

Saturday, November 18, 2017

Scrappy Saturday-Panda boy

Good morning everyone!! Im here this morning to share a layout I made based off this sketch!

I pulled out some Pink Paislee goodies from my stash and a goofy picture of one of my boys. 


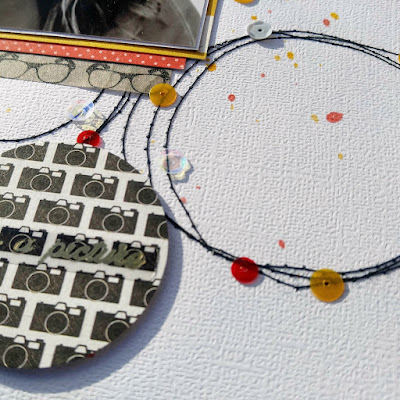
I loved the circles on the sketch, so the first thing I did on my layout was run my cardstock through my sewing machine with black thread. I sewed on a few messy circles and went to matting my photo.


I already knew what sequins I wanted to use and they went great with the paper collection I chose, so I decided to layer red, which I used a punch on and then added a layer of yellow behind it too. After I put my photo where I wanted it, I pulled out the washi, it was grey with some cute glasses on them and I thought since the picture of my son had cute little glasses that they would go great together! So I added that under the bottom of the layers.


I already knew what sequins I wanted to use, I Solemnly Swear, one of the new collections and they went great with the paper collection I chose, so I decided to layer red, which I used a punch on and then added a layer of yellow behind it too. After I put my photo where I wanted it, I pulled out the washi, it was grey with some cute glasses on them and I thought since the picture of my son had cute little glasses that they would go great together! So I added that under the bottom of the layers.


For my title, I decided to add it in to the sewn on circle to the left of my photo. I grabbed some foam thickers and some little yellow ones from Pretty little studios and named my layout, Panda boy. I added my sequins around that circle too along with some more metallic washi stickers and a flair button. And to finish it all off, I grabbed some of my shimmerz and did a little splattering and that was it!


Saturday, November 11, 2017

My Love-Scrappy Saturday/SpieglMomScraps DT

Good morning everyone!! I'm  here this morning to share a new layout that I made for the SpiegelMomScraps DT, scraplifting Rachel Lowel. She had so many great layouts to chose from, but since we had more of a circle theme going this month I chose one of her layouts that had a circle on it too!

Here's the layout of Rachels that I chose to scraplift:


I thought this was a beautiful layout and so sweet. I had the same collection in my stash so I thought I would use it as well. So I grabbed it from my stash and set it to the side. I already had the photos I wanted to use pulled too. Me and my hubby out and about one night.

I chose to make my cut file larger then heres, I wanted it to cover more of the background. So I cut this, to me what looks like a target with little hearts on it and backed it with a light blue cardstock. Then I adheared it to the middle of my layout.


As soon as I got the cut file backed and stuck down, I started layering papers behind my photo strip. I know Rachel chose to use one photo, but I decided to change it a bit and use a photo strip I made on my phone. I layered in papers and even some packaging behind my photo. I kept my photo to the bottom left of the die cut, like Rachel had and started to layer in some stickers.


Rachel had placed her title off to the right hand side of the photo and I followed her lead. I pulled out some of my foam thickers and added my title to the right of my photo. At this point I wanted to embellish a little more so I pulled out my 12x12 chipboard ephemera sheet and added a few hears and a little banner piece that said for you my love.


I grabbed my sticker sheet that goes with this collection and added a few more heart stickers and then went to my sparkalies!
I used a mix of Unicorns&Rainbows and Roadtrips&Sunshine. I thought they mixed well together and matched the colors in this collection so well!! I hope you liked this layout and I hope you come back and see what else all the other ladies make too!!