Showing posts with label puffy stickers. Show all posts

Thursday, March 2, 2023

Today's Stories layout | Clique Kits DT

Good morning everyone! I took a break for a bit and didnt make any blog posts, but I thought I would go ahead and start up agian. Why now? I have no idea, especilly since we have been having such bad weather and there is more to come tonight abd I am not looking foeward to it at all. But my scrapping makes me happy and helps keep me distracted from the weather a bit. But I'm here today to share a layout I made with the Limited Edition Level Up kit. I really like this kit and I already have another layout to share, but that will come later. I like this kit so much becuase you can make complelty different looking layouts with the one kit. This layout, I used mostley the papers in the kit from Asuko Studios.
I liked thecolors and I wanted to go outside the gamer papers. I started this layout with my picuter and then pulled on eofthe papers, the one that looks like it has sun rays on it. I cut it in half and adheared it to the top of my page. I wanted more to it though. I thought it looked to plain, so I pulled a few other papers and cut some strips form a few differnt papers.
I have this thing, I like to add some texture I guess you can say, really I like to distress the edges of my papers. So, of course I did that to this layout too.
I knew I wanted my photo of my son on the lower left side of my layout, becuase of the way he's looking in the picture. So I decided to start adding some papers behind the photo and pop them up on some adhesive foam. I placed that down and started pulling all kinds of embellishments out from the kit. But first I had to add my black splatters on my layout.
Once I took a little snack break while my splatters were drying, I decided it was time to go a head and start adding my embellishments. In the kit there is a pack of Pinkfresh studio cardstock stickers and puffy stickers and thats where my embellishments came from. I started tucking lables and little pennents and puffy stickers here and there along the strips of paper I had placed down. I popped a puffy sticker up at the top of my photo. Today's Stories, I placed that for my title.
I grabbed my type writer and tryped up my journaling, cut it into strips and added ti to my layout and called this one done. I hope you liked this layout. Have you seen all the new goodies in the Cliqu kits shop?? I mean if you havent, you need to go check out the shop, so much goodness in there right now! The kit I used for this layout is there, along with an add on to go with it.

Wednesday, November 10, 2021

You are my sunshine | Clique Kits Design Team

Good morning everyone! I hope your having a good week so far. I'm already ready for the weekend here! I want to get some crafting done! But I wanted to share a layout with you today that I made with my Happy Blooms kit from the Clique kits shop. I love this kit!! The colors are amazing and all the pretty things that come in the kit!!
I have this love for yellow. I don't know what it is, maybe that it's such a bright and happy color, IDK. But I had found the little banner piece that said You are my sunshine and that kind of set the tone for my layout. I pulled one of the papers with that beautiful yellow and white and cut that at a diagonal for my background. I stuck that down to some white cardstock and started pulling papers and ephemera to layer behind my pictures of me and my goofy little girl.
I did run some white cardstock through my cuttlebug to add a little more texture to my layout. WHen I did this I really didn't know where I was going to put it but I wanted to have the option to use it if I wanted. Either way it would be used on something lol.I added a white border to my pictures and layered them the way I wanted and grabbed that beautiful blue paper with pretty flowers all over it and cut a square, then layered a piece of the packaging behind that, ruffing all the edges up as I went. That just wasn't where I wanted it though. I wanted more layers and some more color as well. Since I added that floral paper, I could use pretty much any color I wanted. I went through the tags and other ephemera and found this purple tag and added it in to the layers, then cutting my die cut in half I popped that in there too.
Once I did that I really started to like my layout, but I still wanted more on there. So it was time to break out the ephemera, puffy stickers and die cuts. I went through everything, pulled out way to much as I tend to do lol. Then I started to tuck a flower here, put a puffy sticker there and then I found the big teal floral puffy sticker frame and just had to use it. So I added it in under the tag layer and I love the color pop it gives!
Finishing off my layout pretty much came down to adding the pretty little banners here and there that said things about me and my daughter and doing a little journaling on the back of my layout. I hope you liked this layout, I did have fun making it. I'm trying my best not to hoard all the pretty things lol. I think I'm doing a pretty good job of using my pretties though. Make sure to head over to the shop and check out the new kits and hey if you like this kit, it's still available in the shop too! Along with so many others!!

Saturday, October 23, 2021

This must be the place | Clique kits

Good morning everyone!! I shared this layout on my instagram the other day and thought I'd pop on and share it here too.
This whole layout started with this little photo of one of my littles and here dog in the backseat of my car. We went on a ride one day and they both just fell asleep lol. So, I knew what photo I was using and then, this fabulous kit, the Some days kit, I had from Clique kits made the rest really easy. That cute little pocket was what set the tune for the whole layout. The colors were great. I went through the kit and pulled different items that went along with the colors in that pocket.
I pulled a stencil from a past kit from Clique kits and grabbed a distressed oxide, another goodie from Clique kits lol. Yeah, I have a lot of goodies from Clique kits. Well, I added that to the background, along with some splatters and then went to layering all the lovely bits and pieces till I got them where I was happy with them.
I loved all the journaling pieces there were in this kit, in the Pinkfresh loveliness! And yes, I did actually journal on them, but not till I finished the layout and took pics. I don’t like my hand writing, I share enough of my hand writing in my memory planning lol.
I made sure to pull out some of those cute floral ephemera pieces and puff stickers and tucked them in here and there. Then finished it off with a few enamel dots. I love those things, I use to hoard them but I’m always trying to find a way to put them in now lol. Well I hope you liked my layout and make sure to head over to the Clique kits website and check out all the beautiful kits and check out the blog at all the amazing inspiration!

Sunday, November 11, 2018

Wake up and be awesome / Bella Blvd DT

Good morning everyone!!
We've had a bunch of strong thunderstorms the last few days, knocking power out and lots of rain, but its also been nice because its kept it cooler and when its in the 100's on a constant, its so nice for it to be cooler!
Well I'm here this morning to share a new layout with you using an older Bella collection, Alex. I love this collection, the colors are so bright and I love the fact that it works so well for my older boys!
I got out the Alex collection and pulled a bunch of things that I wanted to use, so that got my color scheme as well. So once I had those pieces pulled out, I started to lay things around my layout to see where I wanted them. Once I got an idea of where I wanted things, I decided to dip into my stash and grab some of my Shimmerz and play with them on my background to add some more pops of color.
I let all the color dry and decided I wanted to add a little more to my background, so I grabbed my Bella Blvd Elements clear stamps and started stamping away on my background. Once I was happy with it I moved on to putting the rest of my page together.
I started by cutting the Daily Details paper apart for layers behind my photo. I added all my layers, got it just how I wanted it, laid it where I thought I wanted it to go and moved on to playing with the Washi stickers. I pulled the ones I wanted to use and stuck them on some white cardstock and cut around them. I did this so that I could pop some of them up and on dimensional adhesive if I wanted to. I laid them across my layout and stitched threw the ones that were flat to the page to add some more texture and popped the other ones up. 
Once I had my washi strips down and sewn threw, I pulled out some tabbies and designer clips and tucked them in at the top of my photo.
I had everything to the right side of my layout and wanted some more to the left side, so I went back and pulled out the same Shimmerz colors and the stamps and added some to the left of my layout. While while that was drying I grabbed the boarders paper and cut a few strips off and added them to the top and bottom of the layout and sewed thew them. Then went back to adding some of the washi stickers, designer clips and some more stitching. To finish off my layout I went in and pulled out different colored Puffy Star stickers and added them here and there on the layout. I mean those go with any layout!! I love them and the dimension they add to a layout.


Alex collection; Beast Mode paper, Daily Details paper, Boarders paper, Tabbies, Designer Clips, Washi Stickers
Illustrated Faith Elements Clear stamps

Puffy Star Stickers; Orange mix, Blueberry Mix, Milk white

Friday, February 2, 2018

Head in the Game Layout/ Bella Blvd DT

Good morning everyone!! Sarah here this morning sharing a layout I made using Bellas Football collection!
This layout didnt quite go as I planned. Most of the time when Im making layout I'll stick with a white background, I just feel like it gives me a blank canvas to play on and keeps things bright, I do use full patterned/colorful backgrounds too, but usually white, and this layout happened to be one of those times!
I did pull out white card stock to start out with. I grabbed my Boarders&Details paper and cut some layers for behind my photo, even a boarder strip that had some footballs on it but it was looking to plain at this point for me so I went back in and started laying my photo and its layers on other papers from this collection and found this one and was so happy I did!!
I was way happier with this as my background and continued to build from there. I cut a star out of one of the papers and tucked it behind the left side of my photo and its layers and then decided I was going to add a little bit of white card stock to this layout. So I cut out a circle, popped up my photos and its layers on some 3D foam and laid it on top of my white circle.


I grabbed the ephemera pack and the fundamentals sticker sheet and started to add pops of red, blue and green around my layout. I popped some up on 3D phone to add some more dimension and I also decided I was going to run my fingernail under the side of my papers to add a little more texture to my layout. 

I got my title, that I added in the center bottom of my photo from the ephemera pack as well and popped it up on more 3D foam, along with a football. I added another football to the upper right of my layout with some stars and other ephemera pieces for another embellishment cluster.

I tucked a larger ephemera piece, with a football helmet on it, behind my photo so that it was sticking out and could still be seen and added a tab as well. I liked that this brought more of the colors in that I wanted and I also liked that it had a big helmet on it too! I wanted a little more texture on my layout and I have a bunch of these adorable puffy stars and of course they match perfectly, so I grabbed my puffy stars in the colors that matched and I tucked them in here and there all around the layout and that finished it off for me. I had fun changing it up a little bit from my norm and I loved how this layout turned out!

Football Collection: Boarders&Details, Throw it!, Game Time, Call The Play, Ephemera pack, Fundamentals, Puffy Star Stickers: Ice, Blueberry, Pickle Juice

Friday, June 16, 2017

This is me 12x12 layout - Fairytale club DT

Good morning everyone!! 
I'm here this morning to share with you a layout I made about myself. I don't scrapbook myself very often, but I am trying to get more in the habit of it, so that my kids have these layouts when there older. I want them to know that I loved crafting, that I was goofy and playful.  So that's the direction I went with this layout.


I started out with my photo. I picked a goofy one that was snapped when were were on an outing. I knew I loved that paper with the script writing on it and I loved what was said on it, so I used that for the larger portion of my background. I was also attempting to not use a lot of white cardstock, this is something I have been challenging myself to do and with all these pretty papers its a bit easier for me! lol I grabbed a strip of the paper that looks like it was colored and used one of my boarder punches to add a little bit of scalloping to one side of the paper and then of course I had to add a little white cardstock off to the left of the layout.


 Once I got the background down the way I wanted, I started going threw the ephemera I had and pulled thing out I knew I wanted to use on this layout. I did grab a doily from my stash too to slide behind the photo on the right. When I realized I was going to do that, I cut out a pretty little floral to put on the left hand side of my layout out for a little more balance. I wanted a little more color over on the left since there was so much while, so I grabbed that bright Hello wood paper clip and stuck it under my photo.
I went back and started layering the bits and pieces on the right hand side. I shuffled them around a few times and decided I was happy with where they were and started to adhere them down. I did pop my photo up on 3d adhesive and then added a little under that cute little poodles head too. I punched out a unicorn from one of the papers and layered it in there too.


I wanted a little to the far right side of the layout and I love love love that cute little lipstick, so I added the tag that said Create and popped the lipstick up and layered it on top. Then I went to the bottom of the layout and layered another unicorn, popped up on a piece of ephemera and then added some pretty sequins around the layout. Then I added the title, with the pretty gold puffy stickers. I didnt want to journal on the front of this layout, so I added a little card on the back an journaled a little for my kiddos.
This kit is just so pretty!!And so easy to play with! Thanks for stopping by to check out this layout!

Wednesday, April 6, 2016

Hip kit club CT/ Sing your heart out!!!

Good morning everyone!!! Im here and up on the Hip kit club facebook page this morning sharing a layout I created with the March 2016 main kit, embellishment kit, paper add on kit and some bits and pieces from the February 2016 kits! Thats one think I love about all these kits, they all go together so well so you can combine them too!!


My layout this week is of a goofy picture of my youngest daughter singing her little heart out! I was so happy to catch this pic cause she always comes in doing things but runs off just as fast,lol, but I actually had my phone in my hand and caught it! She loves music and loves to sing all the time and this was no different, she was singing at the top of her lungs and getttin it!

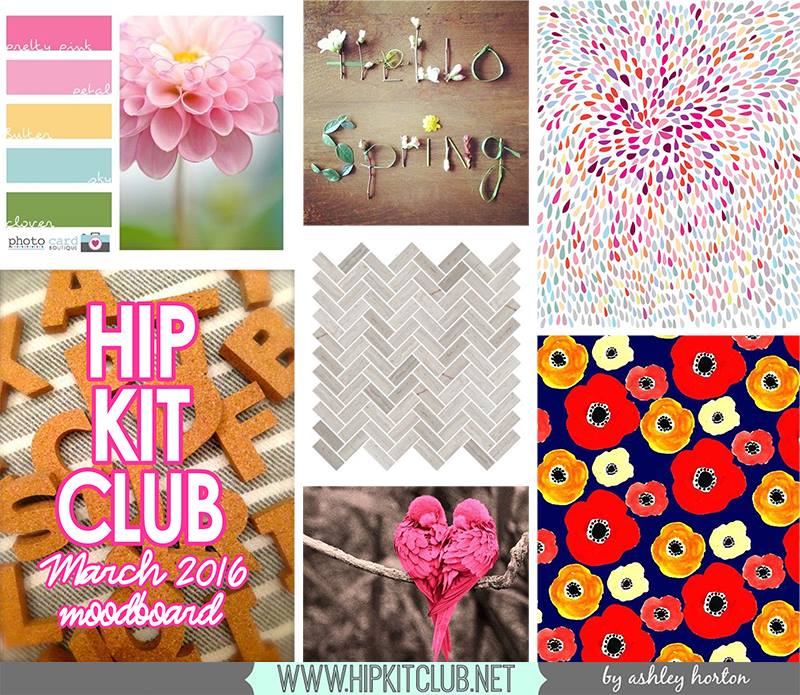
I took inspiration from this months mood board to create this layout. I went with the pinks, bright pops of yellow and little touches of blue. Along with the great American Crafts cork thickers.


I grabbed a few doilies from my stash to add to the layers and dimension to my layout.


I love the all these Pinkfresh Studio, Felicity papers and embellishments!! The colors are fantastic and the 6x6 paper pad that came in the Embellishment kit was fantastic and wow does it make the kit go even further!


I concentrated my layering and cluster to the doilies. They seem to draw my eye more, is it the same for you?


I really do like how this layout turned out and I'm so happy to have gotten it scrapped. Sometimes I think some of my photos are a bit odd and I wonder if i should scrap them but I'm getting to where it doesn't bother me anymore. I took the photo for a reason, even if it doesn't have a big story behind it, its something I wanted to remember and keep.

Well I hope you liked my layout and make sure to visit the links I have above and check everything out!! Thanks so much and make sure to come back next week for more layouts, inspiration and other things!