Showing posts with label Hip Kit Exclusives. Show all posts

Wednesday, October 19, 2016

Thursday, October 13, 2016

This just Happened / 12x12 stash scrap

When I cleaned my scrap room a while back, I found a bunch of partial kits or left overs, bits and pieces from when I was on the Hip Kit club design team. So I thought I might as well bust into them and start to play with them some more. They have a lot of life left to them!! lol


I had seen some papers that had a water colored look to them, but I didn't have one in the colors I wanted, so I decided to make one and I LOVE the way it turned out. I also thought Id use one of the Hip Kit files and stitch on my page, but I decided to use this metallic gold embroidery floss, yeah not something I'll do again!! I love the way it turned out and all but man was it a pain. I've sewn with regular embroidery floss and it was way easy, but for some reason this metallic stuff got stuck SOOOO much and separated constantly! 
Anyways, lol, it turned out good and thats all that matters to me :)
This layout is about my daughter and hubby. They were just sitting on the couch watching TV, my daughter was eating golf fish, she turned and asked daddy if he wanted one, of course he said yes, but when she went to feed it to him she did like we use to when we fed her, lol, we'd open our mouths trying to get her to do the same and she thought she had to show him how to too lol. To funny.

Here are a few up close pics for ya to check out, hope you enjoy it and come back to see what else I make, thanks :)


Friday, July 15, 2016

12x12 So happy together / Hip Kit club CT

 Good morning everyone! Its Friday so I'm really hoping its a good day! Weekend starting, sleeping in (hopefully!) and nice weather!
To kick off the weekend I thought I'd share a layout I created for Hip Kits this week using the July 2016 kits and  mood board as inspiration.


Design team member Ashley Horton created this pretty mood board and I took my inspiration from the water color block in the top right and the pretty confetti in the top left.


I started out by pulling a sheet of American Crafts White card stock from the card stock kit and cutting it down to an 8.5x11 and that was the starting base for my layout. I matted that on a piece of white vellum, also in the card stock kit.
After that I grabbed a few of the Hip kit exclusive patterned paper, created by design team member Kim Watson. These were from the Main kit but you can also buy the paper add on kit to get more, since they are exclusive. I also used the Illustrated Faith paper from the main kit as well.


I took my punches from my stash and started punching circles out of these papers to represent my confetti. But I didnt throw them down haphazardly, I kept them lined up, but in no particular order. When I had them where I liked them I put a little adhesive down to hold them in place till I sewed them down. I added bits from the exclusive ephemera pack from then embellishment kit and sewed the circles and words down. 


I added these cute little houses since the layout was about one of my daughters and her daddy, cuddling up on the floor at grandmas to watch a movie, lol. But once I did that I added a frame to my picture, also from the ephemera pack and grabbed the Bella Blvd ciao chips for the title. I added a few gold rub ons from the project life phrase and icons set and sewed the 8.5x11 layout to the pretty water color looking paper as a background. And that was it, layout was done. 

I hope you enjoyed this layout and hope you come back to see more of what I do. And make sure to check out the Hip kit website for all the beautiful kits, the blog for more inspiration, Instagram and the facebook member forum.

Oh and make sure to come back to see all the lovely sneak peeks of next months kits!!!


Monday, May 23, 2016

Hip Kit club CT/ The Meatloaf

Hello everyone!
 So I've been playing with my May Hip Kits still and loving the versatility of them. I have made girly layouts, boy layouts, cards and now a layout about one of my fur babies.


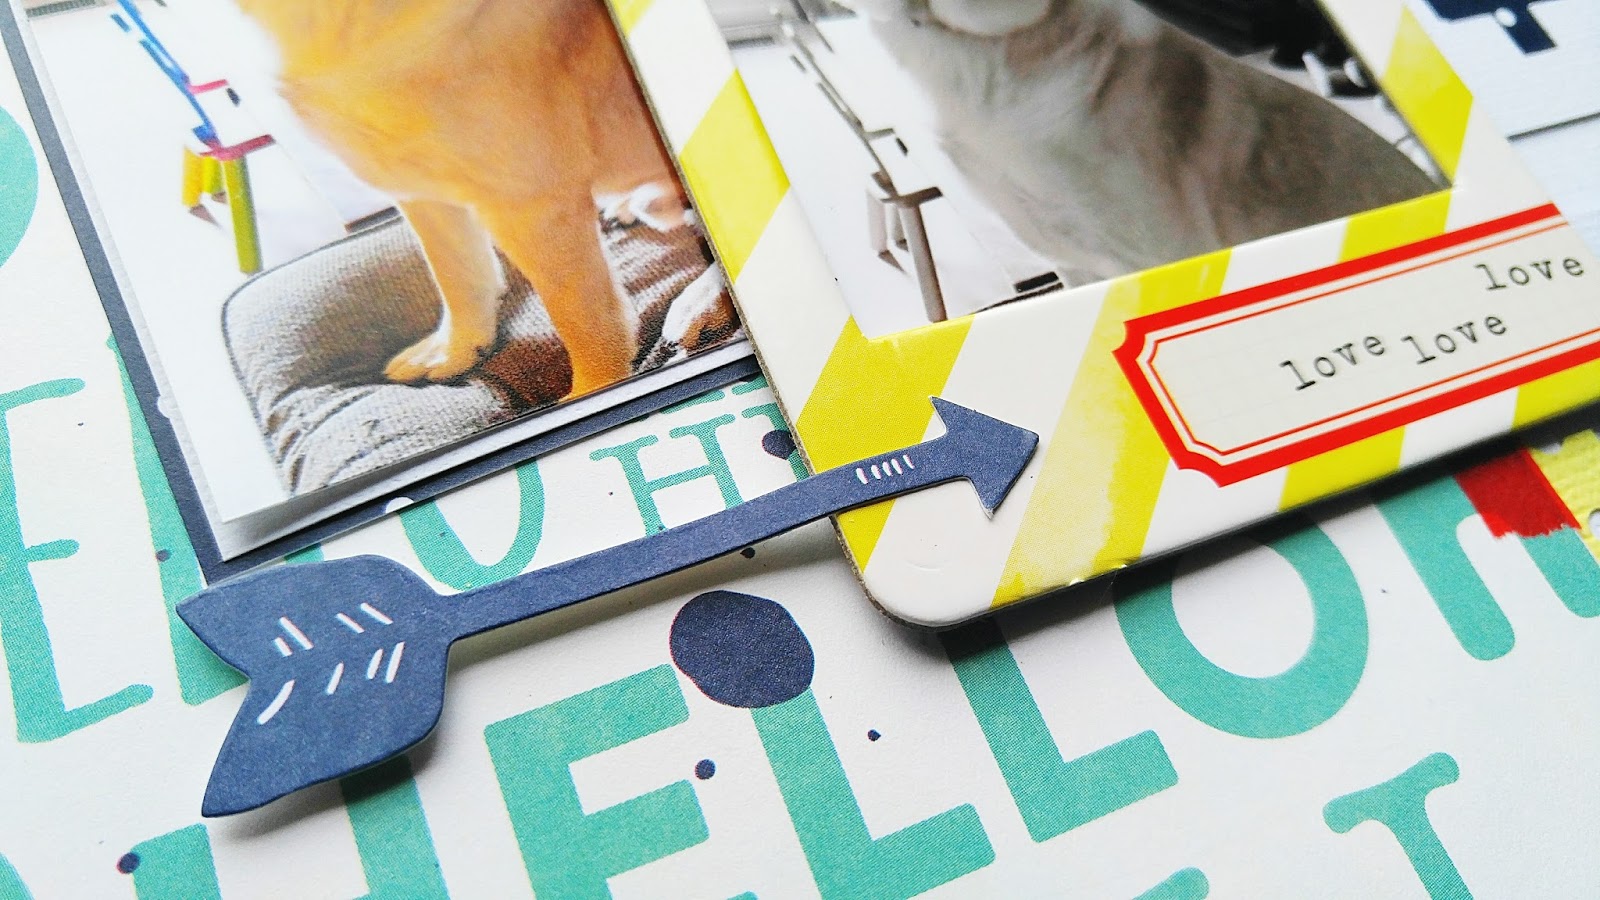
I always go about starting my layouts in different ways, this time I had chose the pictures first. With having that it made it way easier to choose the colors I wanted to use. The Simple Stories, Life in color frame from the Embellishment kit was actually the 1st thing from the kits that I chose. I just thought it was to cute not to use and I liked that it repeated love across the little tag on it.
After that I grabbed a few pieces of American crafts white cardstock from the cardstock kit. I ran one threw my Silhouette and used a cutfile and did a white on white background. I did go back and add some of the HKC exclusive paper, Medowbrook, Starlit Sprinkle from the Main kit created by Kim Watson


After I got my background settled I grabbed the American crafts Butter cardstock from the cardstock kit and punched a few strips to go along side the Jillibean Soup, Healthy Hello soup, Jar of Jambo paper to go behind the pictures of my pup, to give it more of a central place to sit. After I got my pictures settled I grabbed the HKC exclusive ephemera pack and placed a few pieces around the layout, I punched out a few tabs and realized I didnt have any more red any where on the layout so I reached into my stash and grabbed my Little B red washi and used it in a few places and I loved the little pops it gave. 


To finish my layout I needed my title and I love the HKC exclusive puffy alphas in this kit, and the color was perfect so I grabbed them and added my title, I did a little bit of journaling about my goofy pup, this is something I'm trying to do more. Journaling on my layouts is hard for me because Im not big on my handwriting and I always feel like Im going to mess a layout up with it, so I use to always journal on the back, but I want to have things hand written by me for my kits when they get older, so Im trying lol. But after that I added a few enamel dots from the Echo Park Summer Party and that was it for this layout.
I hope you liked this layout, I know I have a few more projects I'll be sharing that were made with this kit, One is even a mothers day gift I made for my mom this year. But make sure you head over to the Hip Kit Club site and check out the June kits before there gone!! I promise you wont want to miss them!!! So many pretty exclusives and other items that match so fantastically!!
And make sure to head over to the blog and see everything all the other lovely DT members have been making and check out the Hip Kit Club Facebook page and join in on some of the challenges, when you participate you have a chance to win a $10 gift card and it would be great to go towards a kit for your first time!


Monday, April 25, 2016

Hip Kit Club/ Awesome Layout and cards For the boys


Hey everyone, I've been a little MIA lately. I got my layout posted last week but that was about it. We've had some stuff going on in our family and I have had no mojo. Anyways....
Well this week I used the beautiful April 2016 Hip Kits. I know these kits are so bright and springy, but I thought it would work great for some pictures I got of our youngest son this last winter. It matched hit yellow coat, lol. And I love the way it turned out!
I usually go with a cardstock background but this time I grabbed  the Just Dream-Horizon patterned paper from the Main Kit, that is a Hip kit club exclusive created by Kim Watson. That was my starting point, then from the main kit I also grabbed the Elle's Studio-little moments-my favorite and used that for the bottom half of the page and then another patterned paper by Kim Watson-Just Dream- MoonStruck. These were the base of my layout.


I did use some American Crafts white cardstock from the cardstock kit to cut out Ashley Hortons-Awesome April cutfile. I did a bit of stitching to add a little texture and because I love to sew on my layouts,lol. I backed my pics with the white cardstock as well, placed them down where I wanted them and started to embellish. 
I grabbed the Pinkfresh Studio-Life Noted- Acetate die cut word, Awesome for my title. I made sure to sew sew threw that over my cutfile. Then I grabbed the Shimelle-StarShine- Ephemera pack and started layering those pieces around my pictures. To finish it off I added one of the Pinkfresh Studio rubber charms, I love those!! Both, the Shimelle and Pinkfresh Studio items came from the main kit.


Then, again its been a rough week here with our family so I made some cards to stick in my boys lunch boxes and let them know that I was thinking about them and that we love them. Just a little note.


I grabbed Kim Watson-Just Dream- MoonStruck and Horizon papers from the main kit for the start of my "hello love" card. I added a small strip of American Crafts white cardstock across the front after adding my tag and a clear sticker from the Shimelle-Starshine-cardstock and acetate stickers from the Embellishment kit. I did grab a Shimelle-Starshine-phrase and letter sticker from the Project Life Kit then stitched everything down.


For the second cards, I started out with American Crafts White cardstock for the base. Then I cut strips of patterned papers from Kim watson-Just Dream-Horizon, Elle's Studio- Little Moments- My favorite and Details all from the main kit. I grabbed a piece of the American crafts-Butter-cardstock from the cardstock kit, along with white vellum and cut a little banner and circle for layering on the front of the card. Then I placed the out of this worls cardstock piece from Shimelle-starshine- cardstock and acetate pieces from the main kit on the layers and then grabbed the Hip Kit club exclusive acrylic stars from the embellishment kit and finished off my layout.

I hope you liked my layout and cards. I had fun creating them and love the fact that these kits can be so versatile!! Make sure to check out Hip Kits facebook page, Instagram, blog, pintrest and the Hip Kit youtube channel for more inspiration on a constant. 
Make sure to come back later this week for another project that I will have up!!


Thursday, April 14, 2016

Hip Kit Club / Captured / Creative with cards

I'm not big on journanling on my layout. One, I don't like my handwriting really and two, I don't always like to share what I'm writing. So a lot of the time I'll write on the back of the layout, then I'm not so ify about my handwriting messing up the layout, thats how I see it sometimes, or I don't journal at all. Do some of yall feel this way or do this too?


I love this month kits, they are amazing!!! You can go soft and light like I did here or you can go bold and bright, which I did on another layout that I'll share later. I made this layout in honor of Friendship week, so heres me and my goofy best friend! lol
I used +AmericanCrafts  white cardstock and the White vellum from the Cardstock kit,  I used the white for the base and my vellum behind my photos, then I grabbed that beautiful Maggie Holmes, Bloom, Flutter paper from the main kit and this was really the only patterned paper I used on this layout,lol.
I fussy cut quite a few of the pretty little butterflies out, I knew when I saw it the 1st time I was going to do that lol, they're just to pretty! I grabber that Heidi Swapp frame from the Embellishment kit because the light pink matched well with the butterflies. It also gave me a good way to keep a vertical line going on my layout like I wanted.


Like I was saying in the beginning, I want to journal on my layouts a lot of the time but don't like my handwriting or I don't want to share what I'm writing, well lucky for me I got the Project life kit, with the amazing exclusive project life cards created by DT member Kim Watson. So I decided to get a little creative with the project life cards, keep the vertical line going and cover my journaling in a pretty way. Not only that but I also got to play with another pretty card Kim made, but I cut the butterfly out, did my journaling and layered it with a few of the butterflies I had cut out. 


I know I shared my journaling here a bit but this is a great way to have your journaling on your page but keep it hid and hide it pretty. lol 
Well to finish off my layout I wanted to add some of the other side of the Bloom paper, flutter, the wood grain, love it by the way. I wanted to add a little texture to the page but keep it soft so I cut 1x1 and 1/2 inch squares out and placed them along the side of the layout and then sewed them down and ruffled them up a bit. I added the acetate Pinkfresh Studio word form the Main kit, sewed it too, then added some of the pretty yellow coloringz by Shimmerz, No yolking, from the Color Kit and that was the end of it.

I would love for you to come back and check out my blog again and make sure to head over to Hip Kit Clubs face book page and blog to check out whats going on there!


Wednesday, March 30, 2016

Hip Kit Club CT/ Real Life

Hi everyone!! I am here tonight to share another layout that I made using Hip Kit clubs March main kit and add ons. This months kits just keeps giving and giving! 


This picture is of my youngest daughter and my husband sitting in the hospital waiting for her to have surgery. All she wanted to do was cuddle. We managed to get some cartoons on, trying to keep her distracted for a bit while we wait, but it didn't work that well. The surgery before her ran long, so she was really hungry since she hadn't got to eat since midnight the previous night, oh I felt so bad!! You try telling a 3 year old you cant have anything to eat or drink all day, yeah her procedure got pushed till around 12:30 in the afternoon! Crazy!!
But it's now done and over with and shes doing better. Well she was, but now shes sick. :( poor baby! Anyways, back to the layout!


I grabbed the paper called ecstatic for my background, this paper is an exclusive to this kit and created by the lovely Kim Watson! Once I figured out my background, I moved on to the layering behind my photo. I grabbed the Pinkfresh Studio, Felicity, Flower Strings paper and cut apart the cut a parts lol. I loved the idea of using them for layering. I also grabbed the 6x6 Pinkfresh Studio paper pad that came in the Embellishment kit
I played with pieces of the Pinkfresh die cuts and the Pinkfresh washi stickers to add to the layering.


To finish off my layout I grabbed those cute little Pinkfresh puffy sequins and screen printed wood veneer, did a bit of sewing on my page, added my title with those beautiful American crafts greeny teal alpha stickers, I love them! I journaled a bit about the day and thanking God that things turned out ok. And that was it for this layout.

Make sure you head over to the Hip Kit Club blog and check out all the awesome layouts and projects all the other lovely ladies on the design team have created. And make sure you check out Aprils kits and grab them before there gone! So many pretties in the coming kit you wont wanna miss it!!
And dont forget to come back by my blog and check it out, you can also swing my my instagram account and see me there!


Tuesday, March 15, 2016

Hip Kit Club layout/ Oh happy day & Good times

Good morning everyone! I got my March kit and was so exited about it!! The exclusive papers created by Kim Watson are AMAZING! So beautiful and vibrant! So of course I grabbed a few of those to work on my 1st layout out of this kit with. 

I Started this layout with the sketch that Design Team member Ashley Horton created for Hip Kit this month. I loved it and then the papers added in with it, so great!


I flipped the sketch on its side to make it fit for what I was wanting to do and then started.
I grabbed 2 papers by Kim Watsons, Just Dream papers and started with those.


I used lots of the bits and pieces from the kits to finish this layout, most of the layout is made up of those pieces lol. I loved how the PinkFresh Studio papers and embellishments went to well with everything in this kit! And the great Basic Grey cork stickers are great!


I did a lot of layering of the ephemera for this layout as you can see and it really was a fast layout. I love when you can put them together so fast and be happy with it. I love when the mojo it flowing good!


There wasnt a ton to do with this layout and I loved that, theres a bunch on the page but it came together so fast it was great! 
Now if you havent already you need to jump over to the Hip Kit site and grab this kit quick before there gone, the kit it self is beautiful but you cant get the exclusive papers anywhere else either! And make sure to check out the Hip Kit blog for the Design team call and all the great work that the other designers do!!


Tuesday, February 9, 2016

Hip kit CT layout/ Oh, snow happy

Goof morning everyone! It is still cold here and we've actually had a really nice snow once, it didnt last long, about a day, but we had so much fun while it was here!! It actually made me think of my pictures from last year. So I went and dug them out and grabbed this one of my 2 daughters. They were having so much fun being pulled on a sled for the 1st time and the colors we perfect!! lol 


This layout came together in about 35 min. My youngest was napping, I had all the house work done, so I figured I would jump in to my scrappy room and see what I could do. I loved the Basic Grey, B-Side paper with those pretty light pink dots, I usually use a plain white background but I wanted to step out of my comfort zone a bit and I like the way it turned out. The light dots made it perfect, not to much for me lol. Then I grabbed some of the scraps I had left over from some of my other layouts and started layering. Oh and I just loved that calendar paper by Crate Paper!! It was perfect for putting the date and it looked cute!


After that I added a few strips from Crate paper  to the top and bottom and outlined everything with my zig pen. After that it was adding the title, American Crafts Crush thickers and one of the great exclusive vellum words. I added little hearts from the great Crate Paper 12x12 chipboard sticker sheet that we got in the main kit and the pretty little exclusive acrylic circles from the Embellishment kit.
We had so much fun last winter and this one was great too!! Not I have some more great memories to scrap! And I love how Januaries kits can work so many ways!!
Well thanks for stopping by today and I hope your inspired to go play with your scrappy stuff today too!! And make sure to head over to the Hip Kit site and check out the New February kits!! They are AMAZING!!! Packed full for tons of greatness from this past CHA!! You wont want to miss it!! And make sure you head over to the Hip Kit blog and check out everything that all the great ladies over there are creating!!


Tuesday, January 26, 2016

Hip Kit club CT/ Love you Rose

Good morning everyone. I've been MIA for a weeks or so and I just wanted to say I'm sorry, I have been sick! And it has not been fun. But I'm back and I have a pretty layout that I created with this months January Hip Kits!!

My daughter is over 3 now and I hadn't scrapped this photo and when I saw the papers and embellishments in this kit, I knew I had found the right stuff to scrap it with! I used Crate paper, Hello,love My valentine paper for the background, I loved it, but I decided to tone down the background a bit with a piece of American crafts vellum from the Carsdstock kit and a little white wash on the top and faded it out towards the middle to made it look omber under the vellum. I just added a little bit of white paint to water to make it fade out just a little.


Next I grabber this beautiful cut file that the lovely Kim Watson made for the Hip Kit club this month. 


I used a lot of the pretty Crate paper Hello, love collection to embellish this layout. Everything was so pretty! And I loved all the gold!!


I added a a few touches from the My Minds Eye, My story brads sheet, with little messy clumps of gold thread here and there and those lovely Hip Kit exclusive acrylic confetti pieces from the Embellishment kit
I wanted this layout to be simple, but pretty, this was a special day and I wanted it to be shown that way as well. I love that my husband managed to get this sweet shot of me and her.

Well I hope you enjoyed my layout and I hope you share what you make with your kits too! and make sure, if you haven't already, head over to the Hip kit Club website and grab your January kit before there all gone and make sure you get next months kit too, Its GORGEOUS!! And smack full of new releases from the recent CHA!!


Tuesday, December 22, 2015

Hip Kit club CT/ Jammin to my tunes

Good morning everyone. Well this month had flown by, its crazy!! I cant believe we only have 3 more days till Christmas! So excited and also anxious! lol I still have so much to do!! But I have been taking some time out for myself with my scrapping. I've been playing with my December Hip Kits still because theres just so much to play with! And Im also moving along with my December Documented album, I'll share that later. But today I wanted to share a layout with you that I created using the sketch that Ashley Horton created for us over at the Hip Kit Club this month.


I think she did a fantastic job with this sketch and I loved it when I saw it and this was my take on this sketch! 
I had this picture of my youngest daughter and oldest son chilling and listening to music and I thought it would go perfect with these papers. I love the way this turned out and I love how my kids all love music so much.


I started out by playing with the cut file Ashley Horton made for Hip kit this month, but I made it to where I only had one of the pretty hearts. Then I grabbed my 6x6 Maggie Holmes Shine paper pad from the Embellishment kit and started tracing and cutting, I added a bit of that fantastic yellow dotted paper by Studio Calico, Seven paper- Elliot, I loved that paper!! After adhering them with them all down with washi tape I went to town with my sewing machine until I was happy with how it looked. I used a bit of Maggie Holmes shine, Divine paper to add a strip of that pretty hot pink to the top and bottom. I matted my photo on some American crafts white cardstock from the cardstock kit, then grabbed a few of the pretty print and cut files that Kim Watson had made for this months kit along with a project life card she created for the project life kit.


After adhering my photo down with some pop dots I started to add some embellishments. I started with my title out of those pretty gold Maggie Holmes alphas, then I added bits from the 12x12 chipboard sticker sheet, a few pieces from the Shine ephemera pack and then a little Heidi Swapp. I love the little note pads and loved the little bit of gold they added and then those freaking cute little rub ons!! Love them! To finish off I added a but of thread and some of those cute little wood veneer stars and that was it for me.


Tuesday, December 15, 2015

Hip Kit CT/ Happy Moments

Good morning everyone! I hope all is well with you all!
I've had a ruff few days here, sick kids and hubby. But I did get a chance to jump back into my December Hip kit and make a layout.


I loved this Studio Calico, Goldie paper as soon as I saw it. The first thing I did to it was adding stitching along the lines and separating all the triangles. I had already decided what picture I wanted to use and that I wanted it in the center of the page, do I added a few sewn circles to where I knew it would be under the picture and any layering I was going to do.
I grabbed a the pretty fountain blue American Crafts card stock from the card stock kit and ran it threw my Silhouette, using one of Nicole Nowosads cut files from this month. I threw a piece of the white vellum from the card stock kit on there as well and cut some pretty little snow flakes out, with another of Nicole's cut files from last month.


I also used Kim Watsons print and cut for this months kit to add a little layering and bits and pieces here and there.  I thought these were just gorgeous! The colors matched perfectly, just like they always do! And they were so cute! I loved the Hiya Life one, I just had to use it.


I used some of the white card stock from the card stock kit, ran it threw my silhouette using another of Nicoles cut files and placed the frame around my picture, along with the one with stars cut out of it. That was the majority of this layout, its really quite simple but I love it. I added a few pieces of paper from the Maggie Holmes Shine 6x6 paper pad that was in embellishment kit and one of Kim Watsons project life cards she created for this kit. I use Kims PL card as my title, Happy moments. Because this was a fun day for us. It was our youngest daughters 1st time building a snow man, or helping lol and she loved it and loved the snow.


The rest of  the kids had a blast too, they love the snow! There a bit disappointed that we haven't had any yet this year lol. I did use Missy Whiddens technique of putting messy bunches of thread around the layout, in the little clusters I made.

Well I really hope you enjoyed this layout and head over to the Hip kit blog to see what the other ladies have created with this fantastic kit!! And please feel free to subscribe to my page so you dont miss anything!! 

Thanks so much!