Showing posts with label The Fairytale club. Show all posts

Saturday, November 4, 2017

Scrappy Saturday-Good Vibes- SpiegleMomScraps DT

Good morning everyone!! I hope your having an amazing weekend, we've had a long weekend here and the kids have been having a blast! Our weather has went from freezing to in the 80's again lol, our weather cant decided what it wants to do here! 
But on to the scrapping and pretties!!
This month were playing with circles and this is the sketch were playing with this week. I love playing with sketches and circles are a fun switch up too!! I have to be honest, I usually stick with squares and rectangles, so its fun to break out of my norm. 

I loved this months new sequins and I really wanted to play with the Dream Land mix. I want to play with them all but I dont know what a layout would look like with ALL of them on there lol. Anyways, I went through my scrappy stash and pulled out what I had left over from the Girly and strong kit from The Fairy tale club. The kit had everything but the purple in it, and I hate that I didnt use the purple cause its one of my favorite colors! But all the other colors matched!!! And I was so happy about that!
I started out playing with a little Shimmerz on the background. I used Spritz Cotton Candy, Dazzlerz Sea U in the morning and splattered a little Shimmerz Bumbly Bee on there too! I do have to say that I am loving Bumbly Bee, its amazing! The shimmer to it is fantastic! Anyways, back to it. After I let the background dry, I sewed four circles on the background in black thread and then started the layering.
Usually I wait to put my sequins on last but this time I started with them! I pulled out my sequins and started placing them around my sewn circles. I wanted to play with them so bad and loved the way they sparkled!! After I placed them down, I thought I should probably get some pretty paper and pictures put down. So I pulled out some pictures of me, of course playing with snapchat again,lol.

I pulled out some doilies from my stash and laid them in my sewn circles and started layering behind my photos. The papers were bright and fun and I loved the way it was coming together. I had already used all the embellishments that came with the kit so I had to make my own, so I pulled one paper that had pretty roses on it and another that had lip stick on it and started to fussy cut!

For my title, I pulled out a Dear Lizzy die cut word and added some cotton candy Spritz, then added it onto of my doily. Then tucked in a large lipstick for fun and a pretty flower.


I finished the layering behind the rest of the photos, cut down the white cardstock and added the light blue, blue striped paper to the background and was done. 
I hope you play along this week with this sketch and make sure to share on instagram and tag Spieglemom_scraps in it!! We'd love to see what you create!! And remember when your checking out at Spieglemom Scraps, make sure to use code SARAH15 when you check out to get 15% off your purchase!


Friday, October 27, 2017

Fairy Tale Club Halloween Banner!!

Good morning everyone!! Sarah here with a cute little Halloween banner I made with this months cute kit.


I started out by pulling papers and planner inserts that I though went well together and of course that I thought were too cute! I got them in an order that I liked and started cutting them down to size.

I started out with the white paper that had all the cool little orange Halloween doodles. I went through the die cut pack and pulled sooo much out lol, and then went to town on embellishing each banner piece. I wanted the die cut Halloween word on the first one. But I wanted to add a few pops of color from the papers too. I used a punch from my stash and punched out some of the purple paper and then tore a piece of the pink paper and adhered them down.I added a gold foil spider web, then added the die cut Halloween word and slid a die cut two toned pumpkin and a gold foiled pumpkin sticker too. 

I moved on the the next on, this was a planner insert and already had the happy pumpkin on it so I added some of the die cut candy pieces. I didnt add much to this one cause I loved that smiling pumpkin!


The middle one was another planner insert. I loved the witch and the colors, so I added a doily behind this one and wasn't sure what else I wanted to do so I moved on.


The Beware one was also a planner insert and I didnt want to add to much to this one either, so I added a few die cut shapes and moved on to the last one.


I actually took a planner insert and cut the adorable teal bat out and wanted to use it. I punched a few of the papers from the kit with one of my punches and layered them, then added the cute little bat on top. I pulled out a few stickers, gold foiled and not. 


I knew I wanted to add more to all of them, so I decided to sew them together and use a little extra stitching on them. I liked the way that looked but wanted a little bling, so I did grab some sequins from my stash, some from one of my 1st FTC kits and a mix of others. After I added the little bit of bling I was happy with it and hung it up on the wall in my kitchen!

I hope you like this little banner I made and I hope you are inspired to play and make something fun for Halloween too!!

Tuesday, August 8, 2017

Oh my darling/ The Fairytale club DT

Good morning everyone! Sarah here with you this morning to share with you another layout with the "Sweet" kit. I mean have you seen this kit? Have you gotten it for yourself? Omg I just love this kit! The colors are amazing and all the little ephemera is just too cute! I mean theres a unicorn and a little record player, not to mention all the other cute little things like candies and Popsicle!


I don't use a lot of patterned backgrounds unless there black and white, Im branching out and using color cardstock too. lol But I just loved this two toned triangle paper, it jumped out at me so I used it. I added a white card stock boarder behind my photo strip. I grabbed the patterned paper that has the light pink triangle on one end and used that to add another layer. I wanted some of the blue in there too, so I grabbed the bold black, white and blue paper and used it for another layer.


I laid my photo strip where I wanted it and started playing with embellishments. I loved those little candy ephemera with the little heart faves on them but didnt want the actual candy on my layout, so I just cut the centers out of them and used them for embellishments. I did the same thing with the sucker. I wanted a few more and a bit of a bigger one, so I grabbed some of my planner pages and cut some of the bigger ones out too. I popped a few up on foam adhesive to give some dimension. I had already cut my title out on my Silhouette, do I put it at the bottom of my layout, since it was so big. Plus it gave me another place to embellish. I wanted some more of the blue color on my layout, so I cut some 1/4 inch strips and added them down by my title. I thought I was going to just add them there, but I liked it and decided I wanted some more of it, So I went back and cut some more and added two more strips under my photo and then up to the top left hand side. 


At this point I liked my layout but it felt like it was missing something, so I jumped back on my Silhouette and cut out that stripped heart and backed it with the white patterned paper that looked like it had brush stroked on it in all the different colors. Once I had that backed, I added it  behind my photo strip and I loved the way that looked. Then I decided to add some stitching to add some texture. So I just machine stitched along my little blue strip. 
I have a habit of using my color shine and shimmerz sprays to add splatters to my layouts, so I thought I would go a little different route this time. So I punched a few circles out from my white card stock and added them to my layout instead and to finish it all off I added a few light pink enamel dots from my stash. 
I really had fun going a bit of a different route for me for this layout. I hope you enjoyed it too! 


Saturday, August 5, 2017

Scrappy Saturday-Bath time baby/SpiegelMomScraps DT

Good morning everyone and welcome to Scrappy Saturday!!!
This month were having fun with some scrap lifting and I was so excited about this! This week were scrap lifting the great Kat Benjamin! It was so hard for me to choose one layout, I went through and saved a ton, just like with all the others and then went back through and eliminated them as I went, lol, so hard!

Here is the layout of Kats that I finally decided to scrap lift.


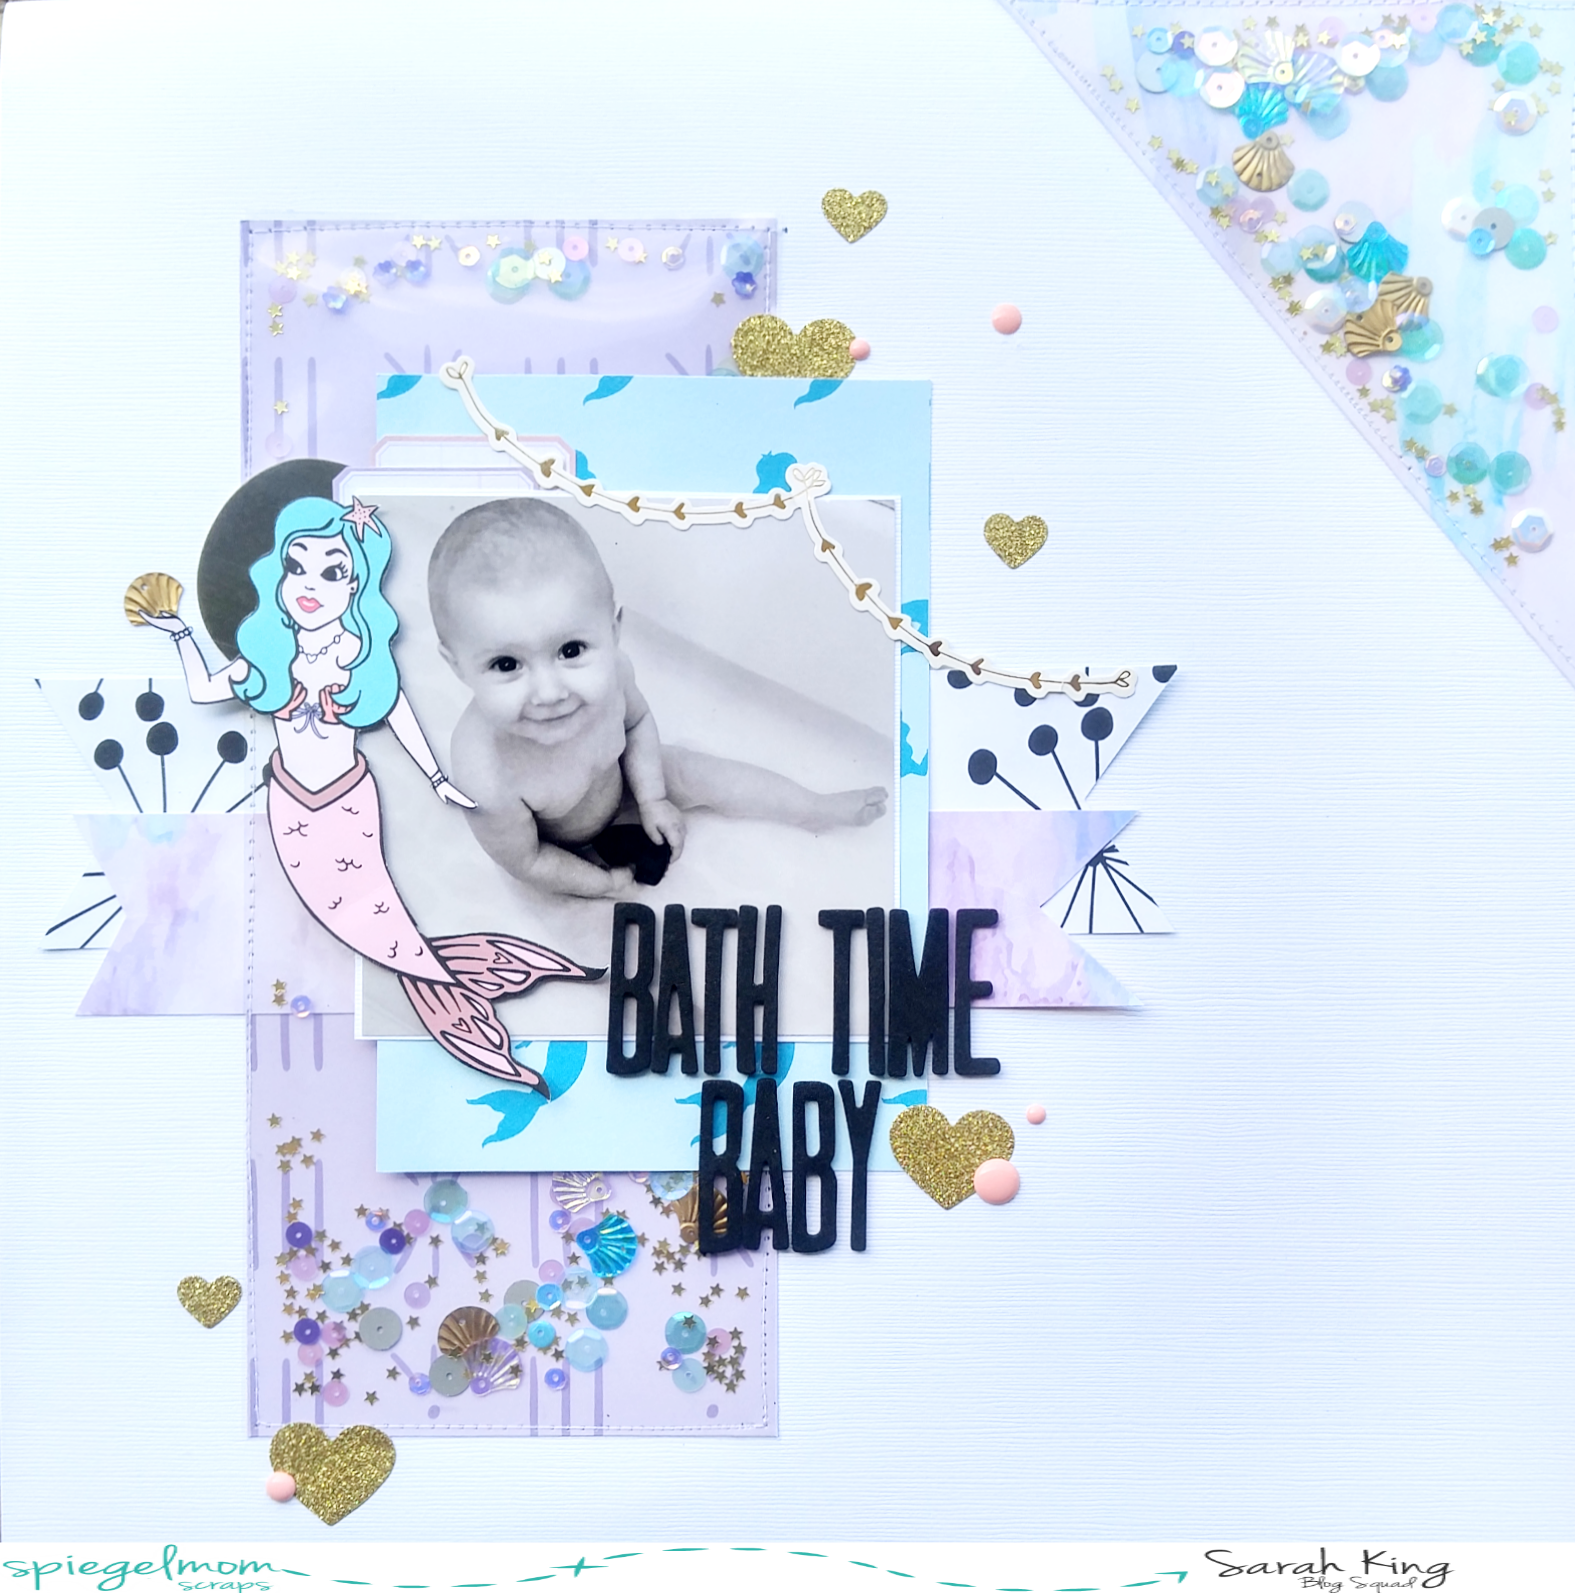
And here is my scrap lift of it!
I loved the layout and knew what picture I wanted to use, along with what collection! I still had some of my  Story Time kit left from The Fairytale Club and the colors and the cute little mermaids were just perfect along with the beautiful sea shell sequins!


I went through and chose what papers I was going to use and pulled out one of my planner dashboards and fussy cut that beautiful little mermaid out.


I arranged all my papers like Kat had arranged hers and then went to pulling out my clear sheets and sewing them down to the long rectangle at the back of my layering and up on my corner. I chose to go with my clear sheets instead of vellum because I wanted to be able to see the patterned paper behind them still after I got the sequins added in.


I left a small space open and poured my sequins in. I used a mix of different sequins, I love that you can mix and match them and they still go so well together! I used some from Black Tie event, Sparkle Power, Sweet Summer Vibes, Bold Stardust and 2 of the min sequin packs, the blue and purple shells. Everything went together so perfectly! I was so happy with it. Kats layout was amazing and I had so much fun playing along and putting my twist on one of her beautiful layouts!
If your looking at adding some great little sparklies to you scrappy stash, make sure to use my code when you go to the shop and get an extra 15% off your order!


Saturday, July 29, 2017

Ice cream&Shades/The fairytale club DT

Good morning everyone!! I'm so happy to be playing with the July "Sweet" kit!
It s so bright and full of summer fun ephemera! I'm sharing a layout with you this morning of two of my little girls enjoying some yummy ice cream on a nice summer day!


I had a hard time choosing what papers to use, I just wanted to use them all, but I finally decided to cut a strip of the paper that looks like it has the paint strokes. I placed that across the center and then moved on to backing my photo. I used one of my planner inserts and backed the photo and then the water color paper too. I fussy cut that cute little ice cream cone out and then used the left over for behind my photo too.


I added the ice cream cone to the right of the photo and then broke into the adorable ephemera pack, I pulled out the little ice cream cones, a ticket and some little bitty hearts and started placing them around the layout.


I had thought I would leave it with an all white background, but decided I wanted more color, and to be honest I wanted to use more of the pretty papers from the kit,lol. I added some of the die cut words to the layout, the yummy just fit! And after I cut it down and placed it on the teal bow paper I added a little ticket, sticker and a heart.


I pulled out a wood button from last months kit and added it and then grabbed some gold alphas from my stash and added my title, Ice cream&Shades.
This months kit has so many pretty papers, I mean the patterns are amazing! The colors are so beautiful too! If you haven't went and checked out the new kit yet, or the past ones, make sure to go look at them!!


Friday, July 21, 2017

Hi/ The Fairytale Club DT

Good morning everyone! Sarah here this morning to share with you a layout I made of me and my goofy mom. She was sick on Mothers Day, but shes my mom and I wanted to see her, so we went down and spent the day with my parents and I got her to play on snapchat with me.


I loved the paper that said you are here and hello there and I wanted to use it as a background, so I pulled that one. Then I grabbed the too cute unicorn paper and cut a triangle from it for my bottom left corner and placed it there. 


I had used an app on my phone and made a photo strip out of some of the pictures and printed them out. I added some of the light teal polk adoted paper behind my pictures, then added the top of one of the tags from the ephemera pack. I pulled a few more pieces from the ephemera pack, like the adorable flamingo and the gold leaves and tucked them in there and there.


I added some of the cute wood buttons and sequins, I didnt follow the rule of 3's on this layout and I had a bit of a hard time because of that, but in the end I thought it turned out pretty good! After tucking things in here and there on the layout and adding my little bit of bling, with the sequins, I added the die cut Hi from the ephemera pack, for my title.
I thought I was done, but I wanted a  little more color on the script paper, but I didnt want to add splatters to this layout. So I grabbed my water colors and started coloring in some of the location symbols.That was it for this layout for me. I hope you enjoyed it and I hope to see what you do with this kit too!! 

Monday, June 26, 2017

Setting up my Planner with June "Storytime" kit/The Fairytale Club

Good morning everyone!
 I'm here this morning to share with you a spread in my memory planner. And man am I so excited to be using the June "Storytime" Kit! It is so beautiful! I have a things for purple and this kit has it!


I do memory planning, but just like a lot of other planner girls, I do a little bit of set up before the month starts. The spread I'm sharing with you today is the last few days of June and the Start of July. 


I started out by choosing a paper from the kit.This was harder then I thought it was going to be. But I decided on the one with the pretty two toned hearts and cut it down to fit the right hand side of the page. I tend to cover this portion, because its already colored in my planner, so I cover it, I dont always do this, but most of the time. After I have that adhered down I choose a washi tape that I want to use, this kit has a lot of gold in it so I chose a gold washi tape. To be honest, I love to use the gold washi anyways, lol. 


At this point I start to play a little with embellishments, inserts, tags and other things. I remembered seeing this "Hi" planner page and I thought that it would be a great way to bring in July! So I punched it so it would fit in my planner and then grabbed the beautiful chipboard alphas and wrote July in different colors. Then I went back and grabbed that cute little crown and added it to the top of the insert.


I did add a few pieces from the ephemera pack. A few of the pretty gold foiled hearts, wrote in things that I knew were happening on these days and added a few other bits here and there. But I did make sure to leave quite a bit open because I know I will add pictures and more journaling.

Junes "Storytime" kit is beautiful and if you haven't subscribed yet, make sure you go check it out, you wont want to miss out on this beautiful kit!!