Friday, July 28, 2023

I'm grumpy when you're not here card | Cut Cardstock DT

Good morning everyone!! How are you today? I'm doing pretty good! I wanted to share a few more cat cards I made. I couldn't help it, these cats are just too cute!
I started with the I'm grumpy when you're not here card. I grabbed my mermaid lagoon distress oxide with my Surf cardstock and blended some of that from the top down until I liked it. I had already decided I was going to use this sleeping cat on the shelf, so I kind of wanted it to look a little like night time. Once I did that I ran it through my sizzix with my heart die. I added 3D foam to the back and was fixing to put it on a white base, but decided to add some shimmery white splatters and then added it to the base. I had already stamped my sayings so I added a little 3D foam to it, just in the center where it would be over the heart. I added the shelf inside the heart and popped the cat up and then added the cute little mouse down in the corner and moved on to the next card.
I took the heart that came from the out-cut of my last card and covered it with a strip of a bunch of colors; Grape Jelly, Hydrangea Purple, Aqua, Surf, Galax, Light Yellow, Wild Salmon, Shimmer Fruit Punch, and Pink Tutu. I also decided to add a border to this card and I did that with some Aqua cardstock. I popped it up with some 3D foam and splattered a bunch of gold splatters on the card base and border and then added my rainbow heart.
I popped my cute little fuzzy guy up on 3D foam, added a little ball of yarn to him and a little saying. I thought I was done but decided to add a little speech bubble with a cut little fish and called this one done!

Wednesday, July 19, 2023

So Cool Layout | Mercy Tiara Kit Club DT

Good morning, everyone!! How are you doing today?? The week is halfway over, are you happy or is it going to slow?? Well for me, scrapbooking helps a little bit with the wishing that the weekend was here already lol and having a new kit to play with, helps even more!! So today I am sharing my first layout with the June kit, Summer Vibes, from Mercy Tiara kit club. And oh man is this kit soooooo worth it! I went outside of what I normally do, no white background!! I think the only white on this layout is the mat for my photos!
I knew what photos I wanted to use, and that Pinkfresh Studio paper, Sun and Sand just yelled at me!! I wanted to use it as soon as I saw it. So, I grabbed it and started cutting it up. Right into the strips that were on the paper but taking out the white bits. I also love the Patina Bazill cardstock so I figured I would combine them. Honestly the most aggravating thing about this layout was my sewing machine! I ran out of thread in the middle of a line I was sewing and didn’t realize it at first, so I had to try and make sure to hit the same holes when I went back over it! Lol That was completely on me!!
Once I had that all under control, I ruffed up the edges of the paper with my nails and moved on to adding my photos. I pulled out the Simple Stories Retro summer bits and pieces along with Pinkfresh Studios floral ephemera and started to add those pieces as layers behind my pictures.
I added my title after that. This was an easy one and after making it a priority with last months kit to use the foam stickers, it was easy to do with this one too. I thought So Cool worked great for this little miss and the color was perfect too! After the title I added a few word strips and of course those beautiful sequins and called this layout done!
Make sure to follow Mercy Tiara kit club on Instagram and join the facebook group too and share your projects!! You can also head over to the Mercy Tiara site and grab this kit and some of the past ones too!

Monday, July 17, 2023

Blessed layout | Mercy Tiara kit Club DT

Good morning, everyone!! How was your weekend? Mine was pretty good, had to deal with some weather again so that sucked but were all here and that’s all that matters. I am still playing with the Mercy Tiara June kit, Brighter Days. I have been absolutely loving this kit!! I also thought I would use another one of the cutfiles you get when you get your kits too.
I decided to go with quite a few photos for this layout, 8 actually. Lol I went ahead and made them into photo strips so I could stack them a little and make sure to get them all on my layout without it being to over whelming. I sent my white cardstock through my silhouette, added a LOT of foam adhesive to the back of it and then backed it with that beautiful Pinkfresh studio, Spring Vibes, Soak it up patterned paper. I love this paper!! I rotated the paper so that the yellow part looked like it was coming out from behind where I wanted my photos to go.
I added that to the right side of my layout and then went to working on my photos and the clusters that I was going to put around them lol
I pulled bits and pieces from pretty much every ephemera pack or sticker sheet there was in the kit and ephemera add on. I had fun cutting things in half and sliding them here and there, layering other bits on top. I added foam behind the photos that were on the left and then added some foam stickers there too.
Once I had everything where I wanted, I pulled out my typewriter and did my journaling. I cut that all down and added it to the left side of my layout and then decided I wanted to add some of the enamel dots and then I called this layout done!
V√I hope you enjoyed this layout and I hope you come back and see what else I come up with. Make sure to head over the Mercy Tiara Kit club site, there are some of this kit left and you can also grab the new July kit, Summer Vibes!! Totally worth it!!

Thursday, July 13, 2023

Happy Birthday dimensional flower card | Cut Cardstock DT

Good morning everyone!! How are you?? Well I wanted to share a quick but oh so pretty card with you today that I made for Cut Cardstock. I wasn't sure where I was going with this card at first, or that it was even going to be a card. I had pulled some flower dies and wanted to play with them so I did. I wasnt sure what I was going to do, like i said, so I cut the flowers out with white cardstock, man I was confused with it too to be honest lol. I stacked it together and found out how it was supposed to stack and then marked on the backs of each piece.
I pulled out my saltwater taffy distress oxide and started blending on the floral pieces from the outside in. After I got the flower pieces the way i liked, I added a little green to the leafs and a but of 2 different yellows to the center and went to using my roller tool to make the sides stick up some.
I grabbed some white cardstock and cut it down to a 4x5 1/4, ran it through my sizzix with an embossing folder, then again with a circle die to cut a place out for my flower. Once I had that, everything was ready except I needed a card base. So I ran through all the colors I had and thought the Surf cardstock looked great. There was a great contrast and it made the flower pop.

Wednesday, July 12, 2023

Treasures layout | Mercy Tiara Kit club DT

Ok, so these kits are big! There is so much in them!! I can’t believe after 7 layouts I still have so much left! I decided I was going to go a little different route with this layout. I started with the pictures and one of the foam sticker titles and that’s it. I liked the color if the title so I thought I would go with pinky/ coral colors and yellows. So, I went through the kit and started to pull things in those colors. When I was done with that, I had quite a bit!
I added a little glue to the backs of my photos when I got them the way I liked and then started to play with layering behind them. Before I started sticking any of that down I decided that I wanted to add a little mixed media to the background. My saltwater taffy was a little too pink so I added a little crackling campfire to it and it worked just fine.
While that was drying, I started to glue the layers together behind my photos. I added 3d foam to the back of my photos before adding some of the paper layers and ruffing up the edges. I got a couple layers in and decided to add more 3d foam for some more dimension. This way I could tuck a little more in there and there too.
I played with the different pieces I had pulled. I loved the little moths! I added a little foam to them too and popped them on here and there. I tucked a label in towards the top, little word stickers that made me think of my little miss and then I moved on to the title and my journaling.
To finish the layout off, I had already added some mixed media to the bottom right side too, so that I could add another cluster of pretties. So, I went to layering some of the labels, tucking a happy days chipboard piece, adding some dimension and tucking a glower in, popping up a moth and then adding a few enamel dots around the layout and I was done!
Make sure to head to the Mercy Tiara kit shop and check out what’s there and keep a look out for the new kit!!

Wednesday, July 5, 2023

Discover | Mercy Tiara Kit Club DT

Good morning crafty people!! I’m here this morning to share another new layout with you using the Mercy Tiara Brighter days kit. This kit just keeps giving and giving! I have been having so much fun playing with it, and I still have more projects to share!! This layout is about me, and all the journaling is hidden, but I have been trying to be better about writing down the story, even if everyone else can’t read it. 
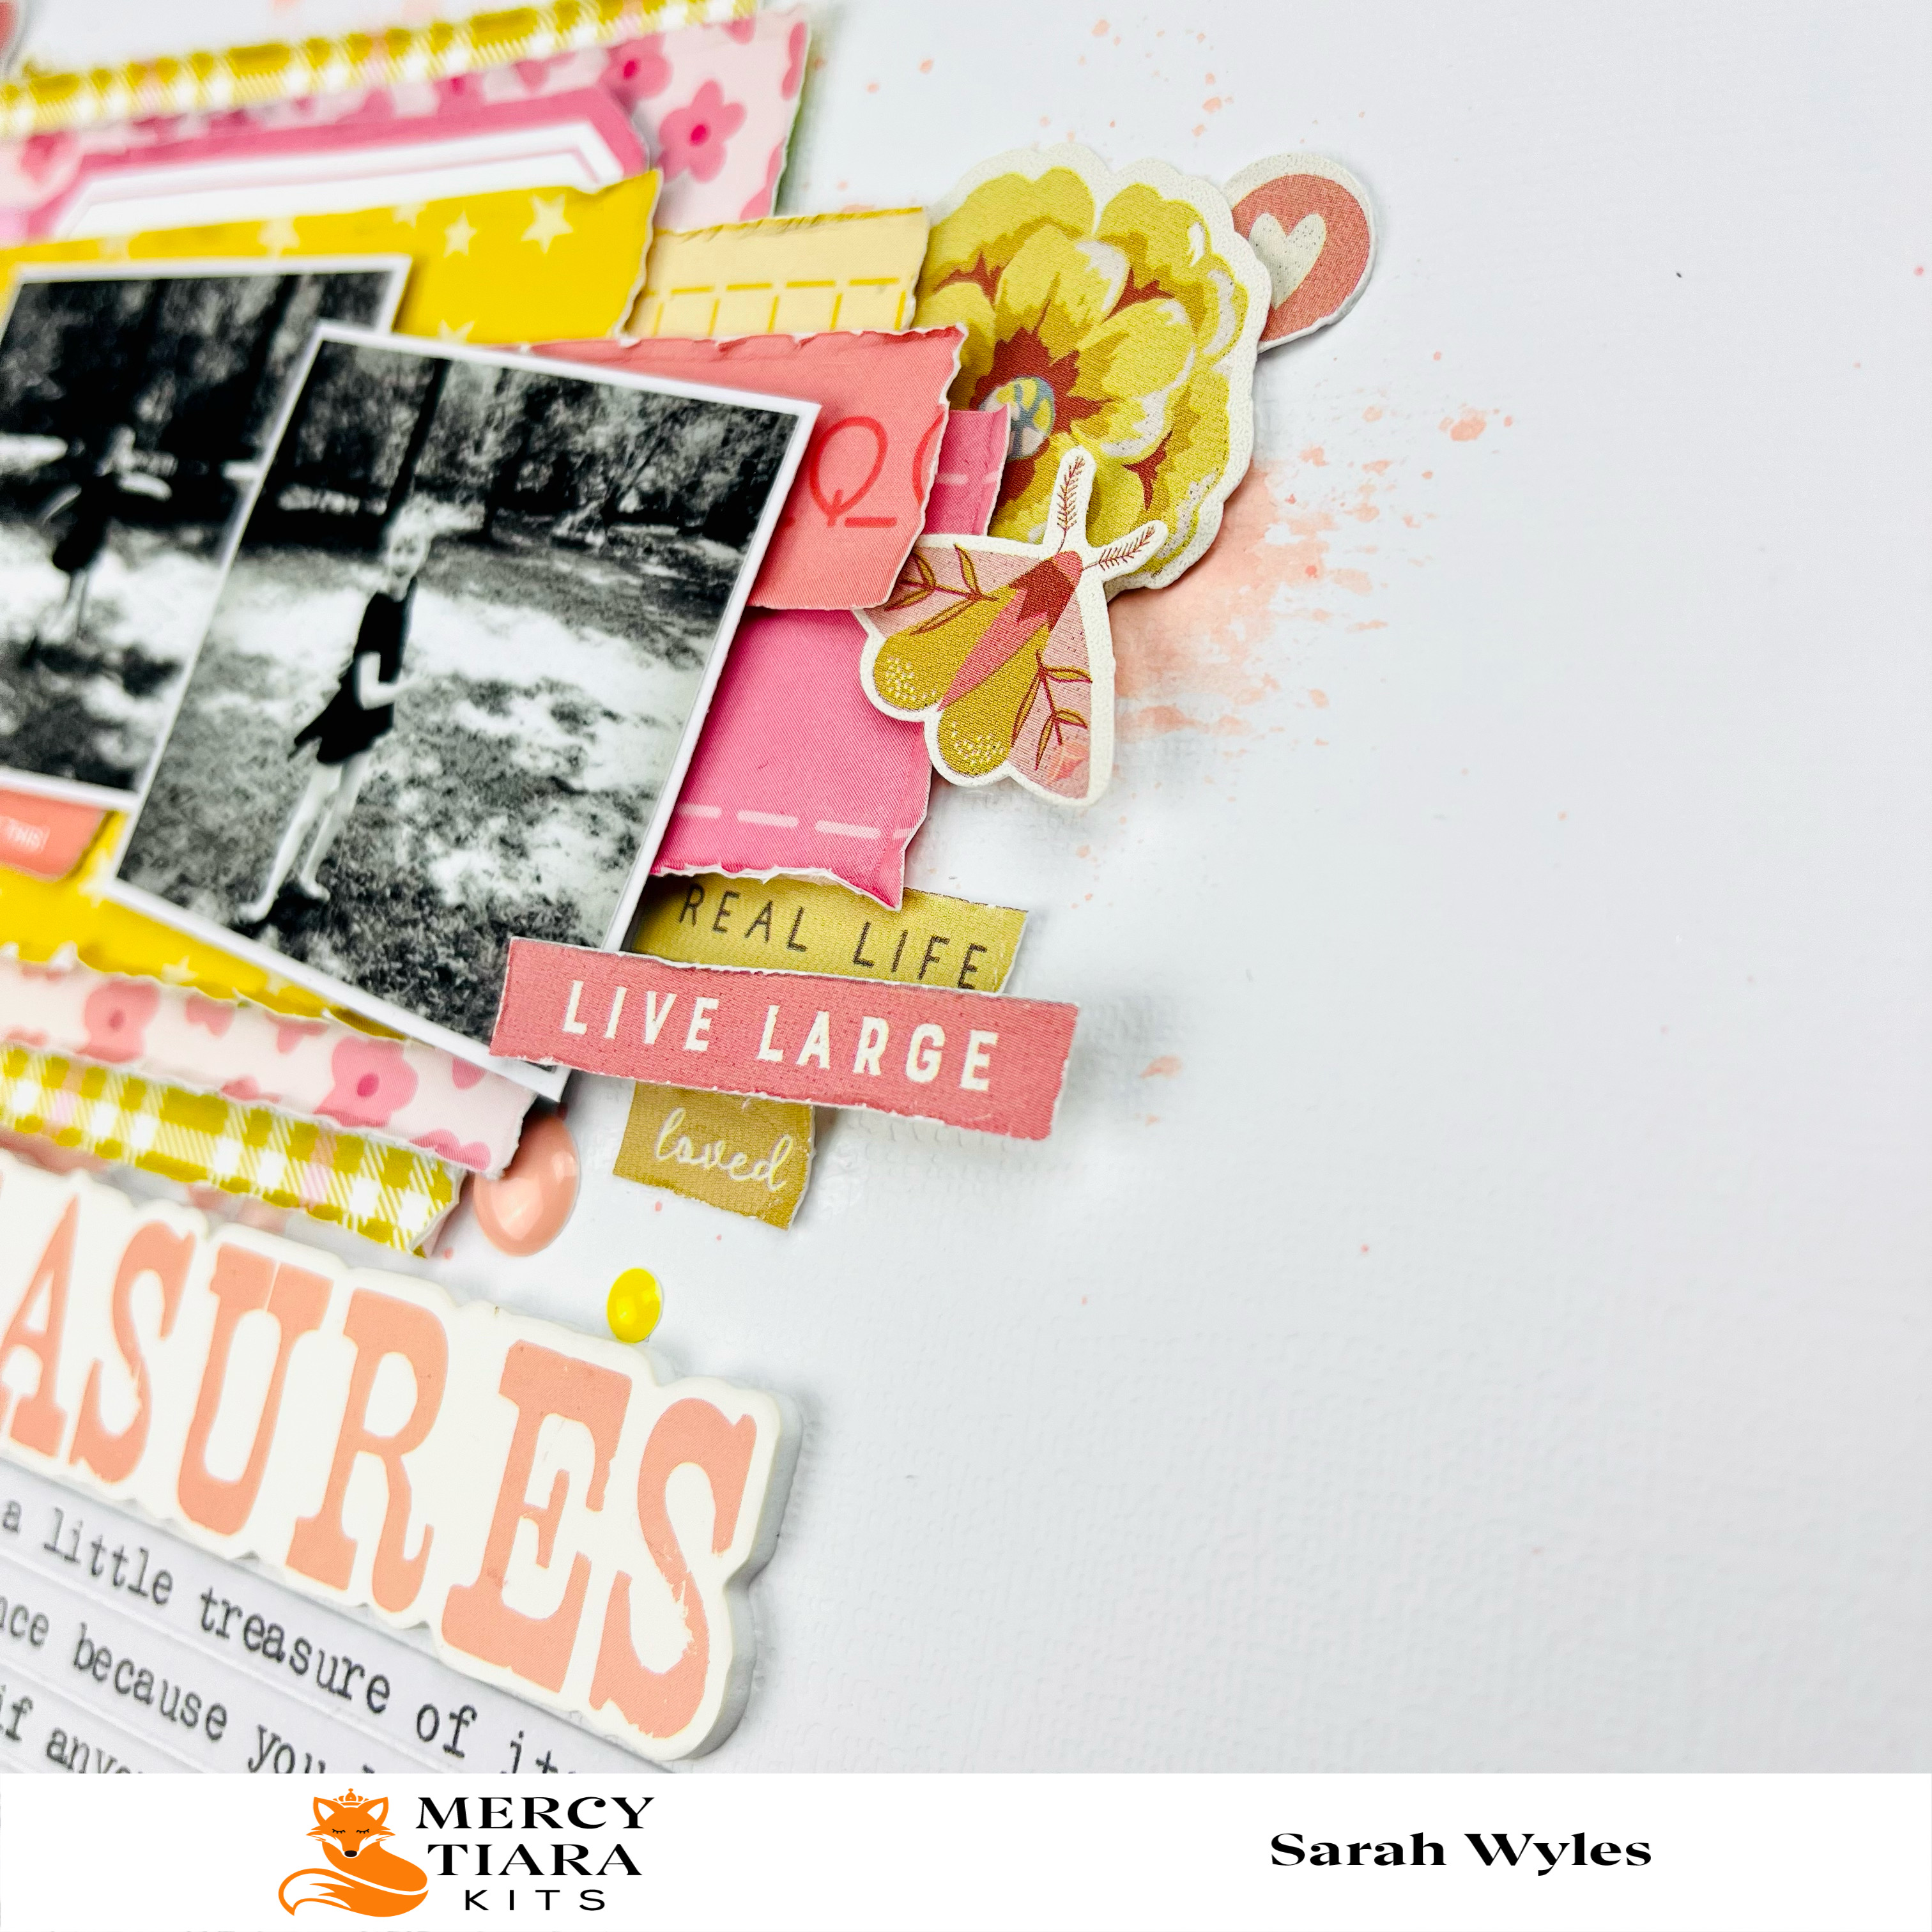
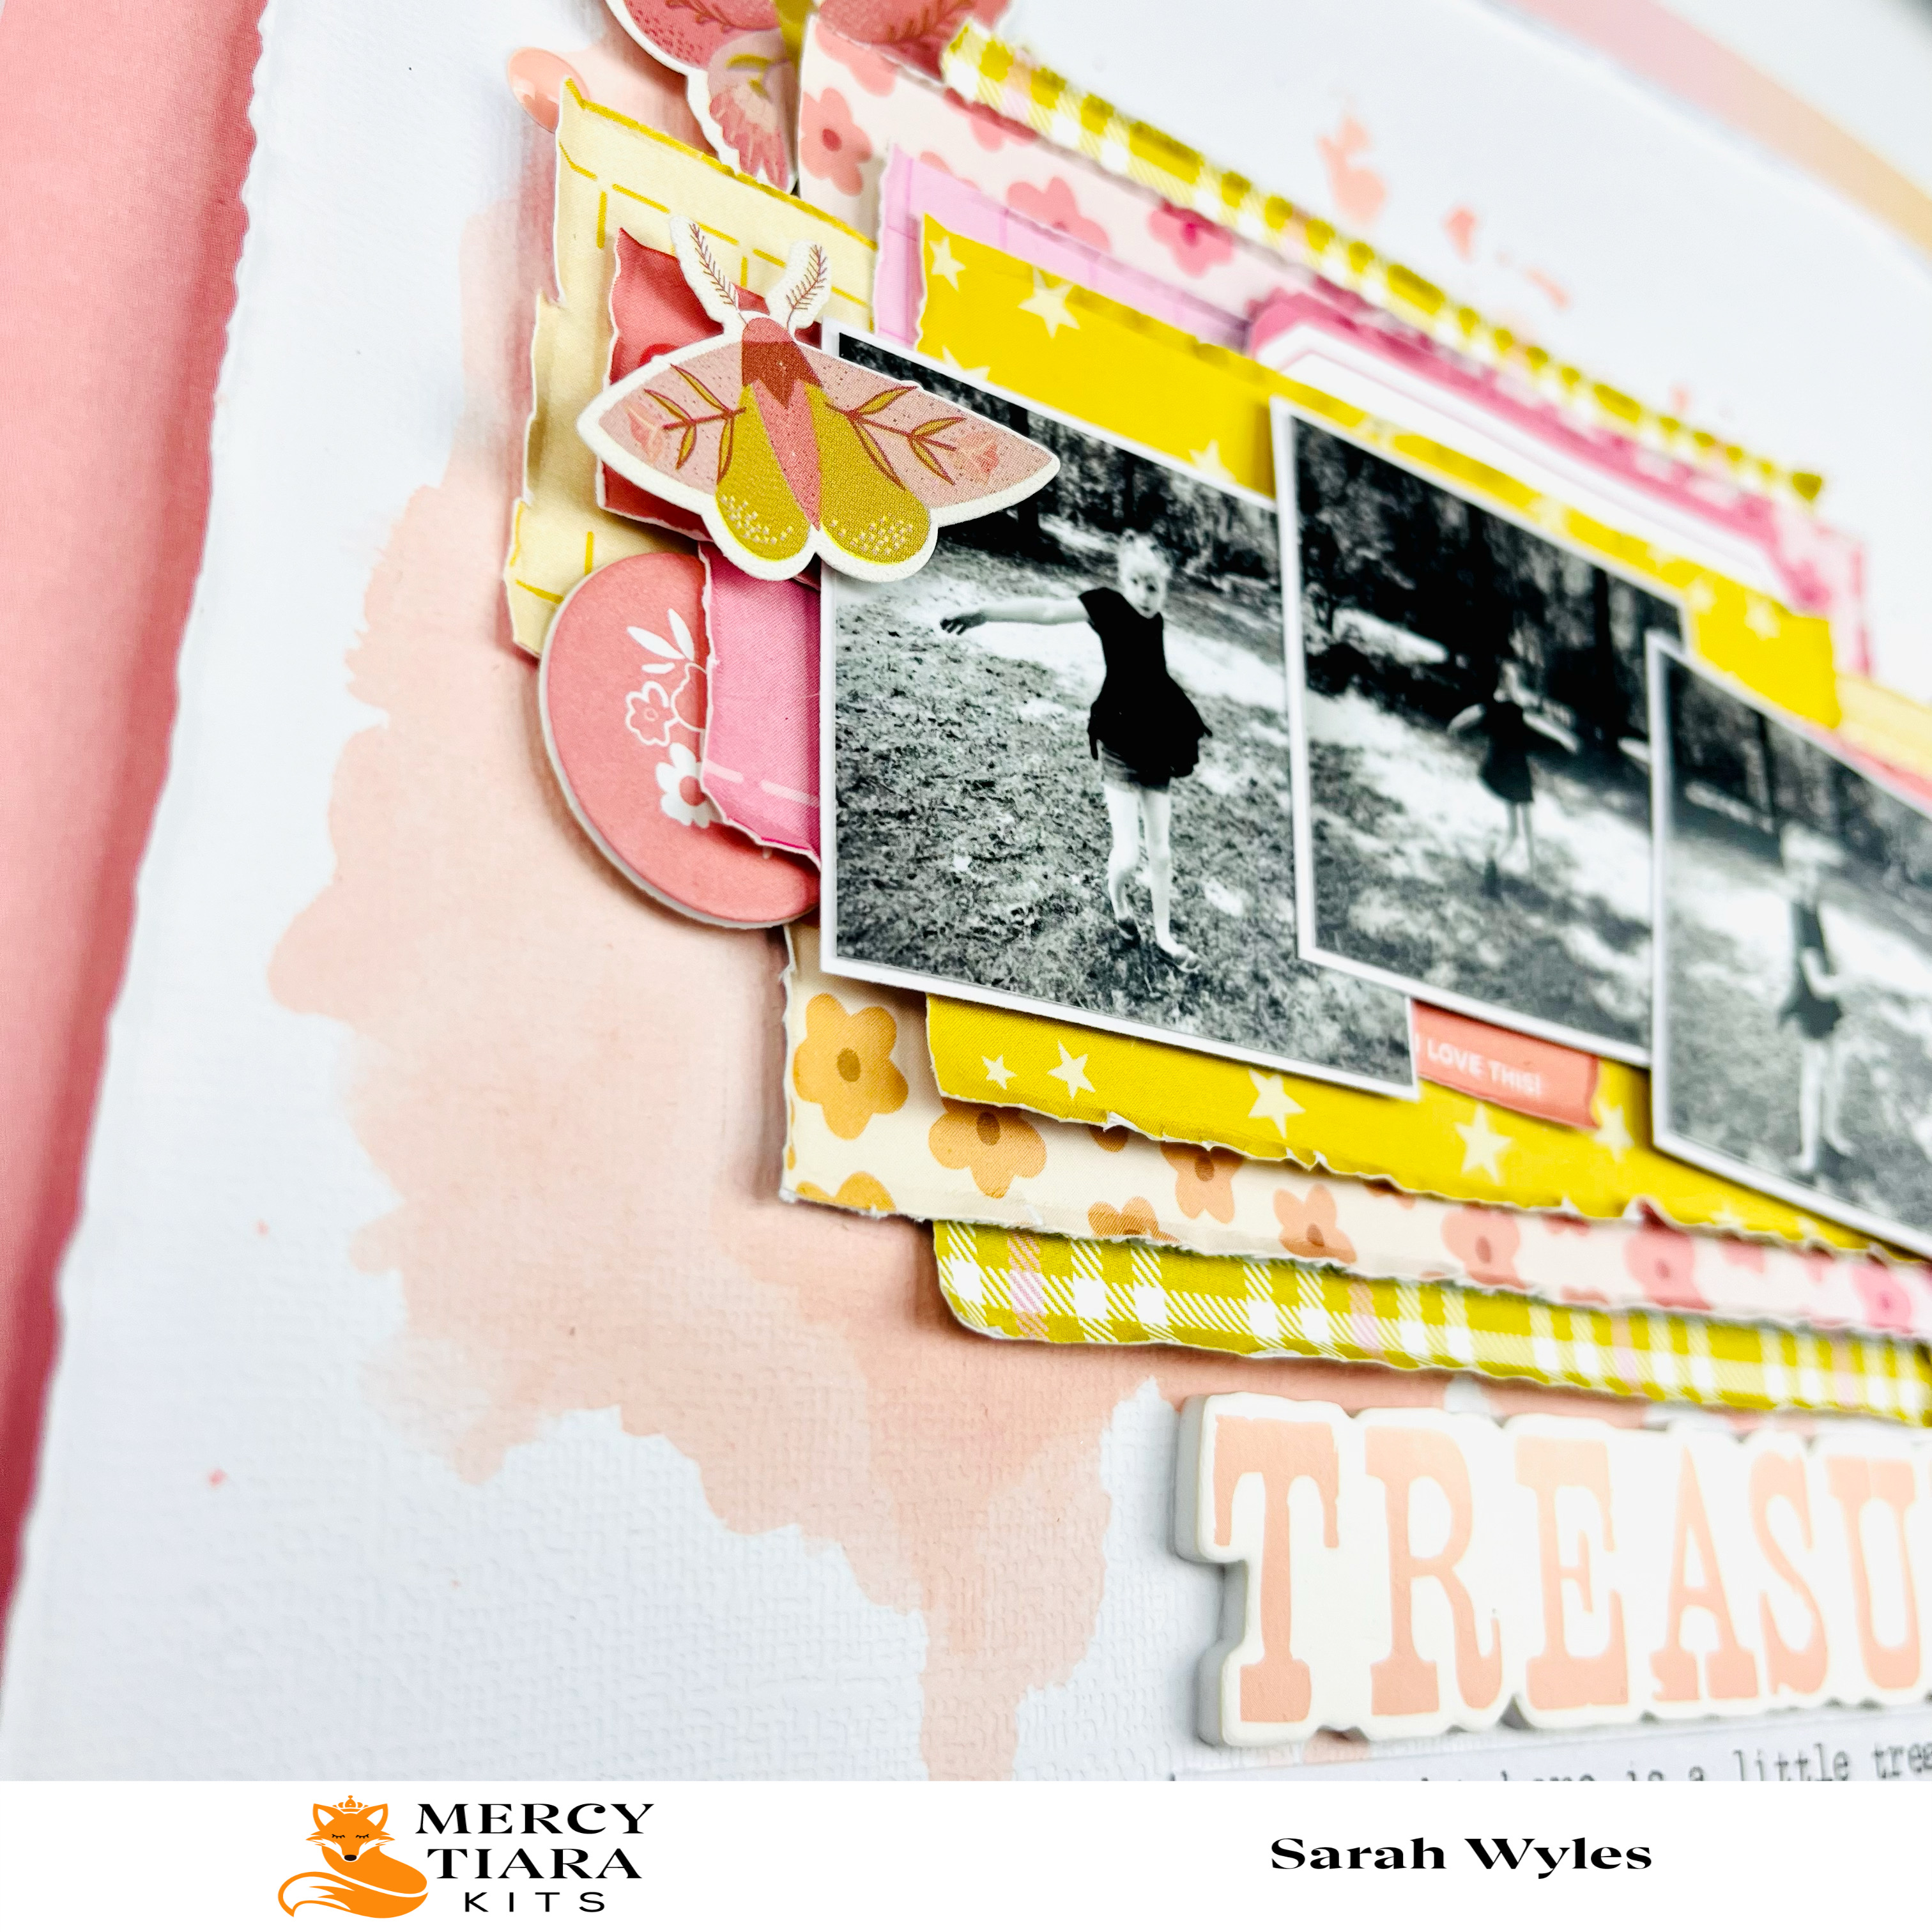
I really started this layout with the picture, the foam sticker title and a piece of white cardstock.
I cut multiple flowers out from the cut files you get when you purchase your kit, I thought since I was doing a layout about me, I could use the pretty flower cut files and flower paper too lol. I pulled the floral paper, it’s from the Flea Market collection from Simple Stories, You’re my fave paper. I knew I wanted to use that, come on its soooo pretty!! Then I pulled different papers that I thought would go with it, some other patterned papers and some that I considered plain or can be used as one for me at least.
I added layers behind my photo, after adding a white boarder of course. I added adhesive foam for dimension and played with the papers till I got them just how I wanted them. I ran some of them threw my sewing machine, added more 3d adhesive and ruffed up the edges. I tucked the pretty flower cut file behind my layers there so that some of it would be sticking out and showing. At this point I hadn’t adhered down my photo and its layers.
I cut a 3-inch strip of that beautiful floral paper and added it to the bottom of my layout and ran it through my sewing machine. I played with the same papers form the ones I used behind my photo; I used the same ones on the bottom. But I didn’t stick them down right away. I decided I wanted to play with a little mixed media and get a bit more of that darker teal color on the page. So, I did. I added a “puddle” behind my photo and its layers and hidden journaling, then I added some to the bottom of the layout where I had picked my title to go.
I added some splatter around the layout too, waited for everything to dry and then stated adhering things down! I tucked some labels behind my title and in those layers I had already made, I slid some foam florals in up by my photo and a cute little camera too!
I tucked in some of the pretty vellum leaves, a life is beautiful banner to the right of my photo, and I decided I was done with layout. I have a question?? Do you show all your journaling where everyone can see it, or do you hide some of yours too? When it’s something personal? I hope you enjoyed this layout, and I hope you come back to check out more!! Make sure to check out my Instagram for more insperation, along with my Youtube TikTok facebook and the Mercy Tiara Facebook Group too!!

Monday, July 3, 2023

The Best Day layout | Mercy Tiara Kits DT

Good morning crafty people!! How are you this morning? I’m doing pretty good, getting crafty lol I wanted to share another layout with y’all using the Brighter Days kit by Mercy Tiara Kits. I am seriously loving this kit!! There are two papers now that I have completely cut up, but having the paper add on made it easier for me to do! I knew exactly what picture I was scrapping for this layout so grabbing papers was where I needed to start. And I wanted bright colors, so no white background this time.
I had a hard time with this one, I love all the papers in the kit, but I finally decided on the Tell the story paper. I though the light pink would be nice, and I could use bolder paper on top without it being TOO busy. I have had a problem cutting up the flower paper, Your my fave, but I decided to go with it and ripped it down! I have an issue with wasting stuff, so I flipped over the extra piece and slid it under the flower paper and loved the way it looked so I cut another piece down and slid it under the bottom side too.
So, for me the main part of this layout was done. I knew where my photo was going and that left everywhere else to put my title, journaling and all my pretties!
I pulled out the container that I put all my fussy cut Woodland Grove gold foiled paper and started sliding the florals behind different layers, behind my photo and then at the bottom right end too. I pulled out my typewriter and did my journaling, this way I knew how much journaling I had and where I needed to put it so I could add more to my layout.
I have been trying to finish off the foam sticker sheet cause they are usually hard for me to use, so I had picked that to be something I was shooting to finish completely with this kit. So, I picked my title and placed it. There was a good area for it and the white around it made it stand out a bit. I popped my photo up and slid a few more flowers under it, part of a frame and a cute little word ephemera piece and moved on to tucking things here and there.
I didn’t fully glue down my flowers that I’d fussy cut cause I wanted them to stick up a bit and I also still wanted the option to slide a few things under them or in them too. The Pinkfresh vellum pieces were too cute so those are a few of the things I slid in with my fussy cut florals. I added some word stickers here and there that when with my layout and that was it for this layout! I hope you enjoyed this layout and I hope you come back for more inspiration! Make sure to check out the Mercy Tiara kit club site too so you see the past kits, what’s still available and what the new kit is!!